MWO-9-2320-280-35-2 - Page 30 of 116
MWO 9-2320-280-35-2
25
(11) Install 12342738 template to outside of right "B" pillar and secure with two existing screws and
washers removed in step (10) as shown in figure 48.
(12) Using template and GGG-D-751D drill bit, locate and drill 0.125-inch diameter hole in right "B"
pillar as shown in figure 48.
(13) Remove two screws, washers, and template on right "B" pillar and enlarge hole drilled in step
(12) to 0.468-inch diameter as shown in figure 48.
i. LEFT LOWER BRACKET ASSEMBLY INSTALLATION.
(1) Position 12342732 template on "B" pillar and "B" beam. Using template, drill two 0.125-inch
diameter holes in "B" pillar as shown in figure 50.
(2) Enlarge two holes drilled in step (1) to 0.343-inch diameter as shown in figure 51.
(3) Position 12342733 template on "B" pillar and "B" beam. Using template, drill two 0.125-inch
diameter holes in "B" pillar as shown in figure 50.
(4) Enlarge two holes drilled in step (3) to 0.343-inch diameter as shown in figure 51.
(5) Install 12342372 bracket assembly to "B" pillar and secure with four 454869 screws and 2436162
washers as shown in figure 51.
j. RIGHT LOWER BRACKET ASSEMBLY INSTALLATION.
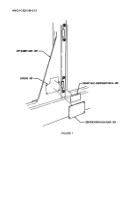
(1) Remove four rivets and VPC bracket from left side "B" pillar as shown in figure 52.
(2) Position 12342732 template on "B" pillar and "B" beam. Using template, drill two 0.125-inch
diameter holes in "B" pillar as shown in figure 50.
(3) Enlarge two holes drilled in step (2) to 0.343-inch diameter as shown in figure 51.
(4) Position 12342733 template on "B" pillar and "B" beam. Using template, drill two 0.125-inch
diameter holes in "B" pillar as shown in figure 50.
(5) Enlarge two holes drilled in step (4) to 0.343-inch diameter as shown in figure 51.
(6) Install 12342372 bracket assembly to "B" pillar and secure with four 454869 screws and 2436162
washers as shown in figure 51.
(7) Remove five screws, nuts, receptacle, and clamp from VPC bracket as shown in figure 52.
(8) Position receptacle in 12340654-1 bracket and secure with four MS35206-246 screws and 271163
nuts as shown in figure 53.
(9) Position existing cap eyelet to mount hole on bracket and secure with MS35206-246 screw and
271163 nut as shown in figure 53.
(10) Locate, mark, and drill two 0.191-inch diameter holes in "B" pillar as shown in figure 53.
(11) Install bracket to "B" pillar and secure with four 12339355-1 rivets as shown in figure 53.
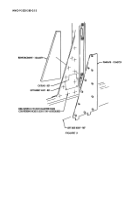
(12) Locate, mark, and drill a 0.172-inch diameter hole on "B" pillar front reinforcement as shown in
figure 54.
(13)
Position MS21333-75 clamp on VPC cable and secure clamp to hole drilled in step (12) using
12342499-1 screw as shown in figure 54.
(14) Locate, mark, and drill two 0.281-inch diameter holes
on "B" beam as shown in figure 54.
(15) Locate, mark, and drill two 0.191-inch diameter holes on "B" pillar as shown in figure 54.
Back to Top

