TB-9-3950-253-13-P
PALLETIZED LOAD SYSTEM TRUCK, M1075 and M1075A1 (PLS) AND HEAVY EXPANDED MOBILITY TACTICAL TRUCK, M1120, M1120A2, AND M1120A4 (HEMTT), ENHANCED CONTAINER HANDLING UNIT (E-CHU)
TECHNICAL BULLETIN; OPERATOR AND FIELD MAINTENANCE, INSTALLATION INSTRUCTIONS, AND REPAIR PARTS AND SPECIAL TOOLS LIST
JULY 2009
TB-9-3950-253-13-P - Page 130 of 704
0014-4
TB 9-3950-253-13&P
0014
CONTROL PANEL – CONTINUED
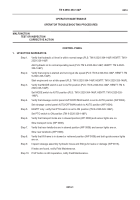
4. STOW BUTTON INOPERATIVE.
Step 1.
Verify that hydraulic oil level is within normal range (PLS: TM 9-2320-364-14&P, HEMTT: TM 9-
2320-326-14&P).
Add hydraulic oil to normal operating level (PLS: TM 9-2320-364-14&P, HEMTT: TM 9-2320-
326-14&P).
Step 2.
Verify that engine is started and running at idle speed (PLS: TM 9-2320-364-14&P, HEMTT: TM
9-2320-326-14&P).
Start engine and run at idle speed (PLS: TM 9-2320-364-14&P, HEMTT: TM 9-2320-326-14&P).
Step 3.
Verify that MODE switch is set to AUTO position (PLS: TM 9-2320-364-14&P, HEMTT: TM 9-
2320-326-14&P).
Set MODE switch to AUTO position (PLS: TM 9-2320-364-14&P, HEMTT: TM 9-2320-326-
14&P).
Step 4.
Verify that stowage control panel AUTO/OFF/MAN switch is set to AUTO position (WP 0004).
Set stowage control panel AUTO/OFF/MAN switch to AUTO position (WP 0004).
Step 5.
HEMTT only: verify that PTO switch is set to ON position (TM 9-2320-326-14&P).
Set PTO switch to ON position (TM 9-2320-326-14&P).
Step 6.
Verify that transport locks are in stowed position (WP 0008) and sensor lights are on.
Stow transport locks (WP 0008).
Step 7.
Verify that rear twistlocks are in stowed position (WP 0008) and sensor lights are on.
Stow rear twistlocks (WP 0008).
Step 8.
Verify that lift frame is in stowed or retrieved position (WP 0008) and both guide sensor lights
are on.
Step 9.
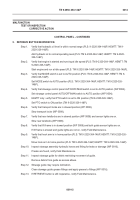
Inspect stowage assembly hydraulic hoses and fittings for leaks or damage (WP 0016).
If leaks are found, notify Field Maintenance.
Step 10.
Inspect stowage guide for debris restricting movement of guide.
Remove debris from guide as access allows.
Step 11.
Stowage guide may require lubrication.
Clean stowage guide grease fittings and apply grease to fittings (WP 0016).
Step 12.
If STOW button is still inoperative, notify Field Maintenance.
MALFUNCTION
TEST OR INSPECTION
CORRECTIVE ACTION
0.
Back to Top


