TM-1-1500-344-23-2 - Page 177 of 240
A-7
NAVAIR 01-1A-509-2
TM 1-1500-344-23-2
15 April 2009
are considered disposable. As such, they should not be
cleaned or reused.
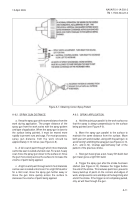
A-5.6. ZAHN NO. 2 VISCOSITY CUP. Viscosity of
paint materials can be checked by measuring the time
required for the material to flow from a cup with a
specified volume through a specified orifice size in the
bottom of the cup (see Figure A-4). A Zahn No. 2 Cup
is constructed of corrosion resistant steel. This cup will
hold 44 milliliters (1.47 ounces) of material and has a
calibrated orifice in the bottom. The cup must not be
damaged or altered to ensure consistent volume; the
size of the orifice must also remain the same. Do not use
abrasive materials or metallic objects to clean the cups
since damage to the volume or orifice may occur.
Viscosity is measured using the Zahn No. 2 Cup as
follows:
a. Prepare the paint to be tested. Mix and strain per
manufacturer’s recommendations.
b. Fill the cup by submerging it into the material.
Make sure that enough material is available to completely
fill the cup.
c. When the cup is full, raise it completely out of the
material and immediately start a stopwatch. Carefully
observe the flow of paint from the orifice.
d. When the constant stream or flow of the material
breaks, stop the watch. The time required (in seconds)
for the stream to break is the viscosity value. Viscosity
values will vary among coatings. Primers are usually
applied at lower viscosities (15-25 seconds), and
topcoats, such as MIL-PRF-85285, are usually applied
at higher viscosities (18-30 seconds). Refer to the
application instructions for specific coating requirements.
To avoid exceeding VOC limits, do not add additional
paint thinner unless specifically authorized by the
manufacturer’s instructions.
A-5.7. WET FILM THICKNESS GAGE. Wet film
thickness of coatings is used to estimate the dry film
thickness. Wet film thickness is easily obtained using a
comb-type thickness gage (refer to Figure A-5). As a
general rule, dry film thickness will be approximately 50
percent of the wet film thickness. Wet film thickness is
obtained as follows:
a. Place gage on wet paint film at a 90
°
angle. This
is done on test panels sprayed at the same time as the
actual component or on masking tape adjacent to the
actual component just after the coating is applied.
b. Press gage into film. Withdraw and note deepest
tooth having paint on it and next higher tooth that is not
coated.
c. The wet film thickness lies between these two
readings.
d. Clean gage with a suitable solvent immediately
after use.
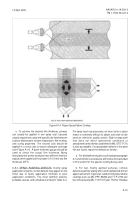
Figure A-3. 3M PPS Mounted on a Spray Gun
Figure A-4. Zahn No. 2 Viscosity Cup
Back to Top

