TM-5-3895-372-10 - Page 137 of 184
TM 5-3895-372-10
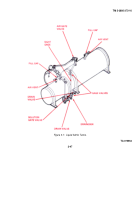
(5) Open the drain valve (fig. 3-7) (turn counterclockwise). Allow the cleaning agent or water to drain.
(6) Close the air gate valve (turn clockwise).
(7) Close the drain valve (turn clockwise).
NOTE
If you flush the system with a cleaning agent, you should flush it again with clean
water.
In freezing weather, you should blow all moisture out of the system (para 3-
11).
3-9. Emptying the Dry Admix Bin.
NOTE
Many dry admixtures absorb water and harden.
These admixtures must always be
removed from the bin at the end of the day.
a. Remove the Lower Hopper from the Upper Hopper.
(See fig. 3-10) Unscrew the four C-clamps.
Slide the dry
admix tube out of the guides and remove the lower hopper.
b. Empty any Remaining Admix from the Lower Hopper.
c. Clean the Upper and Lower Hopper. Use a dry cloth.
NOTE
If necessary you may wash the upper and lower hopper.
However, they must be
absolutely and completely dry before they are reinstalled.
d. Install the Lower Hopper to the Upper Hopper.
Slide the lower hopper into place Be sure the lower hopper tube
and clutch are properly alined. Tighten the four C-clamps (fig. 3-10).
3-10. Aggregate Bins Cover.
The tarpaulin cover furnished with the mixer Is to be installed at all times except when loading the sand and stone bins
This keeps moisture in the bins at the proper level.
It also prevents blowing and freezing when the vehicle is enroute to the
site. Install the tarpaulin as shown in figure 3-11.
3-51
Back to Top


