TM-9-2320-272-24-4 - Page 642 of 836
5-108. CRANE
TM 9-2320-272-24-4
THIS TASK COVERS:
a.
Disassembly
c. Assembly
b.
Cleaning, Inspection, and Repair
INITIAL SETUP:
APPLICABLE MODELS
M936/A1/A2
SPECIAL TOOLS
Seal retainer remover and replacer
(Appendix E, Item 117)
TOOLS
General mechanic’s tool kit (Appendix E, Item 1)
Soft-jawed vise
MATERIALS/PARTS
Relief valve kit (Appendix D, Item 533)
REFERENCES (TM)
TM 9-2320-272-24P
EQUIPMENT CONDITION
Crane control valve removed (para. 4-201).
GENERAL SAFETY INSTRUCT IONS
Keep fire extinguisher nearby when using
drycleaning solvent.
Drycleaning solvent is flammable and toxic. Do
not use near an open flame.
Load check valve kit (Appendix D, Item 270)
Eight snaprings (Appendix D, Item 665)
O-ring (Appendix D, Item 469)
O-ring (Appendix D, Item 468)
Four O-rings (Appendix D, Item 489)
Four lockwashers (Appendix D, Item 350)
Drycleaning solvent (Appendix C, Item 71)
Lint-free cloth (Appendix C, Item 21)
NOTE
Do not perform this procedure unless relief valve kit and load
check valve kit are available.
WARNING
Drycleaning solvent is flammable and toxic. Do not use near open
flame and always have a fire extinguisher nearby when solvents are
used. Use only in well-ventilated places, wear protective clothing, and
dispose of cleaning rags in approved container. Failure to do this may
result in injury or death to personnel and/or damage to equipment.
1.
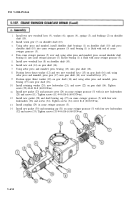
Thoroughly clean exterior of crane control valve (3) with drycleaning solvent (para. 2-14).
2.
Remove eight snaprings (21), pins (20), and four handles (19) from base (2) and crane control
valve (3). Discard snaprings (21).
3.
Remove four nuts (13), lockwashers (14), screws (1), control brackets (15) and (7), and base (2) from
crane control valve (3). Discard lockwashers (14).
4.
Remove nipple adapter (17) and O-ring (16) from crane control valve (3). Discard O-ring (16).
5.
Remove nipple (18) from nipple adapter (17).
NOTE
Mark position and angle of tube and all elbows for assembly.
6.
Remove tube (6), connector (5), and O-ring (4) from crane control valve (3). Discard O-ring (4)
7.
Remove two elbows (10), three adapters (11), and two O-rings (12) from crane control valve (3).
Discard O-rings (12).
8.
Remove four elbows (9) and O-rings (8) from crane control valve (3). Discard O-rings (8).
5-636
Back to Top


