TM-9-2320-280-10 - Page 193 of 405
TM 9-2320-280-10
2-134.4
Change 1
d.
Pulling Load.
NOTE
Refer to table 1-17.1. (Optional 10,500 lb), Winch Data, for pulling capacity.
(1)
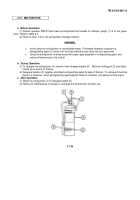
Remove remote control switch (5) from stowage box (6) and cap (9) from
controller plug (7) and connect hand controller connector (8) to controller plug (7).
(2)
Move clutch lever 1 (1) to “LOW” position and leave clutch lever 2 (4) at
“FREE” position to place winch (2) in “LOW” range.
WARNING
Direct all personnel to stand clear of winch cable during winch
operation. A snapped winch cable may cause injury or death.
CAUTION
Do not move winch levers with load on winch or when powering
winch in or out.
(3)
Press “OUT” remote control button (10) or “IN” remote control
button (11) until load has been retrieved.
e. Securing Winch After Operation.
CAUTION
Winch cable must be wound onto the drum under a load of at least
500 lbs (227 kg), or outer wraps will draw into the inner wraps and
damage winch cable.
(1)
Wind winch cable (2) until hook is 4 ft (1.2 m) from cable guide (12).
(2)
Move clutch levers 1 (1) and 2 (4) to “FREE” positions and rotate drum
by hand to retrieve the remaining cable.
(3)
Remove hand controller connector (8) from controller plug (7) and place
remote control switch (5) in stowage box (6).
(4)
Move clutch lever 1 (1) to “LOW” position and clutch lever 2 (4) to
“HIGH” position to lockup winch (3).
(5)
Install cap (9) on controller plug (7).
HYDRAULIC WINCH
LEVER CONFIGURATION
WINCH MODE
Clutch lever (1) “FREE”. Clutch lever (2) “FREE” – “FREESPOOL”
Clutch lever (1) “LOW”. Clutch lever (2) “HIGH” – “WINCH LOCKED UP”
Clutch lever (1) “LOW”. Clutch lever (2) “FREE” – “lock LOW gear”
Clutch lever (1) “FREE”. Clutch lever(2) “HIGH” – “lock HIGH gear”
LEVER 1
FREE
LEVER 2
FREE
LOCK
LOCK
Back to Top


