TM-9-2320-280-20-2 - Page 58 of 951
3-24. FUEL TANK MAINTENANCE (Cont’d)
TM 9-2320-280-20-2
3-38
Change 3
This task covers:
a. Draining
d. Cleaning and Inspection
b. Removal
e. Assembly
c. Disassembly
f.
Installation
INITIAL SETUP:
Tools
General mechanic’s tool kit:
automotive (Appendix B, Item 1)
Materials/Parts
Access cover gasket (Appendix G, Item 1)
Fifteen locknuts (Appendix G, Item 70)
Adhesive (Appendix C, Item 1)
Sealing compound (Appendix C, Item 46)
Drycleaning solvent (Appendix C, Item 18)
Twelve O-rings (Appendix G, Item 215)
Personnel Required
One mechanic
One assistant
Manual References
TM 9-2320-280-10
TM 9-2320-280-24P
Equipment Condition
• Battery ground cable disconnected (para. 4-73).
• Rear propeller shaft removed (para. 6-4).
General Safety Instructions
• Do not perform this procedure near fire, flames, or
sparks.
• Cleaning will be done in a well-ventilated area and a
fire extinguisher will be kept nearby when solvent is
used.
WARNING
Diesel fuel is highly flammable. Do not perform this procedure near fire,
flames, or sparks. Severe injury or death will result.
NOTE
Have drainage container ready to catch fuel.
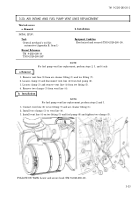
1.
Remove fuel tank filler cap (1).
2.
Remove drainplug (3) from fuel tank (2). Allow fuel to completely drain into container.
CAUTION
Do not overtighten drainplug. Drainplug must not turn in hole. Sharp edge
of hole may cut rubber.
3.
Install drainplug (3) flush with bottom of fuel tank (2) and tighten.
1.
Disconnect large vent line (4) from filler spout (5).
2.
Remove locknut (15), washer (12), capscrew (11), washer (12), and clamp (13) from vent line (4) and body (14).
Discard locknut (15).
3.
Remove locknut (16), washer (7), capscrew (8), washer (7) and clamp (6) from filler spout (5). Discard locknut
(16).
4.
Loosen clamp (9) and remove hose (10) from filler spout (5).
b. Removal
a. Draining
Back to Top


