TM-9-2320-280-20-3 - Page 814 of 1168
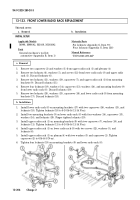
12-132.1. INSTALLATION OF NEW CONFIGURATION FRONT RADIO RACK BRACKET
This task covers:
a. Vehicle Preparation
b.
Installation
a. Vehicle Preparation
NOTE
Refer to para. 10-66 for rivet removal.
1.
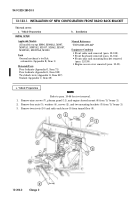
Remove nine screws (7), plenum panel (11), and engine shroud mount (6) from “A” beam (1).
2.
Remove four nuts (5), washers (4), screws (2), and two mounting brackets (3) from “A” beam (1).
3.
Remove two rivets (10) and radio rack brace (8) from tunnel floor (9).
INITIAL SETUP:
Applicable Models
All models except M996, M996A1, M997,
M997A1, M997A2, M1037, M1042, M1097,
M1097A1, M1097A2, M1123
Tools
General mechanic’s tool kit:
automotive (Appendix B, Item 1)
Materials/Parts
Four locknuts (Appendix G, Item 71)
Four locknuts (Appendix G, Item 128)
Two blind rivets (Appendix G, Item 237)
Sealant (Appendix C, Item 38)
Manual References
TM 9-2320-280-24P
Equipment Condition
• Front radio rack removed (para. 12-132).
• Front floorboard removed (para. 11-154).
• Front radio rack mounting bracket removed
(para. 12-130).
• Engine access cover removed (para. 10-15).
TM 9-2320-280-20-3
12-204.2
Change 2
Back to Top

