TM-9-2320-361-24-1 - Page 1072 of 1176
TM 9-2320-361-24-1
0171 00
0171 00-2
AIR-HYDRAULIC CYLINDER REPLACEMENT (Contd)
WARNING
• Do not disconnect air lines before draining air reservoirs.
Small parts under pressure may shoot out with high velocity,
causing injury to personnel.
• Accidental or intentional introduction of liquid contaminants
into the environment is a violation of state, federal, and
military regulations. Refer to Army POL (WP 0001 00) for
information concerning storage, use, and disposal of these
liquids. Failure to do so may result in damage to environment
and health of personnel.
CAUTION
When disconnecting hydraulic lines and hoses, plug all
openings to prevent dirt from entering and causing internal
parts damage. Remove plugs prior to installation.
NOTE
Prior to removal, tag all air and hydraulic lines for installation.
REMOVAL
NOTE
Use a drain pan to capture any draining brake fluid. Dispose of
fluids in accordance with local policy and ordinances. Ensure all
spills are cleaned up.
1.
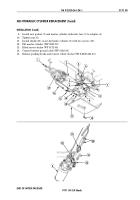
Remove two screws (10) and shield (11) from air-hydraulic cylinder (2).
2.
Remove master cylinder hydraulic line (5) and gasket (3) from adapter (4). Discard gasket (3).
3.
Loosen nut (6) and turn master cylinder hydraulic line (5) out of the way.
4.
Disconnect hydraulic pressure line (7) from adapter (8).
5.
Remove vent line (12) and gasket (13) from elbow (14). Discard gasket (13).
6.
Disconnect trailer air line (21) from elbow (22).
7.
Disconnect air supply line (16) from elbow (15).
8.
Disconnect connector (20) from stoplight switch (19).
9.
Remove screw (1) and air-hydraulic cylinder (2) from brackets (9) and (17).
10.
Remove stoplight switch (19) from tee adapter (18).
11.
Remove elbows (14), (15), and (22) and adapters (4) and (8) from air-hydraulic cylinder (2).
12.
Remove, tag, clean, and inspect all adapters and elbows from air-hydraulic cylinder (2). Inspect for
cracks, breaks, or stripped threads. If damaged, discard.
INSTALLATION
NOTE
All male pipe threads must be wrapped with antiseize tape
prior to installation.
1.
Install elbows (14), (15), and (22) and adapters (4) and (8) on air-hydraulic cylinder (2).
2.
Install stoplight switch (19) on tee adapter (18).
3.
Install air-hydraulic cylinder (2) on brackets (17) and (9) with screw (1).
4.
Connect connectors (20) to stoplight switch (19).
5.
Connect air supply line (16) to elbow (15).
6.
Connect trailer air line (21) to elbow (22).
7.
Install new gasket (13) and connect vent line (12) to elbow (14).
8.
Connect hydraulic pressure line (7) to adapter (8).
Back to Top


