TM-9-2320-361-24-1 - Page 880 of 1176
TM 9-2320-361-24-1
0134 00
0134 00-2
TRANSFER CASE CONTROLS AND LINKAGE MAINTENANCE (W/O PTO) (Contd)
REMOVAL
1.
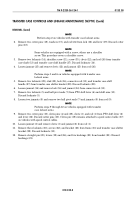
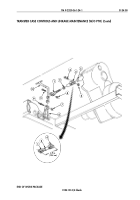
Remove two locknuts (6), screws (3), rod (1), and clevis (4) from transfer case shaft (5) and transfer
case shift handle (10). Discard locknuts (6).
2.
Loosen jamnut (2) and remove clevis (4) and jamnut (2) from rod (1).
3.
Remove locknut (7), screw (9), and transfer case shift handle (10) from transfer case shift
bracket (8). Discard locknut (7).
CLEANING AND INSPECTION
WARNING
Skysol 100 solvent is combustible; DO NOT use or store near
heat, sparks, flame, or other ignition sources. Use mechanical
ventilation whenever product is used in a confined space,
heated above ambient temperatures, or agitated. Keep
container sealed when not in use.
Contact with Skysol 100 may cause skin irritation. Use
chemical-resistant gloves. In case of skin contact, remove any
contaminated clothing and wash skin thoroughly with soap and
water. Wash contaminated clothing before reuse. Eye contact
may cause irritation, tearing, or blurring of vision. Use face
shield or goggles when eye contact may occur. In case of eye
contact, flush eyes with large amounts of water for at least 15
minutes or until irritation subsides. Inhalation may cause
irritation to upper respiratory passages. DO NOT have food or
drink in the vicinity. Failure to comply may result in injury to
personnel.
1.
Clean all parts with Skysol 100 solvent and dry with clean rag.
2.
Inspect all parts for breaks, cracks, and bends. If broken, cracked, or bent, replace part.
INSTALLATION
1.
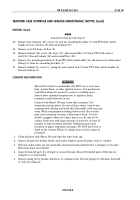
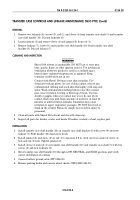
Install transfer case shift handle (10) on transfer case shift bracket (8) with screw (9) and new
locknut (7). Shift handle (10) must move freely.
2.
Install jamnut (2) and clevis (4) on rod (1) to measure 4.9 in. (12.4 cm) from center of clevis (4)
hole and rod (1) hole. Tighten jamnut (2).
3.
Install clevis (4) and rod (1) on transfer case shift handle (10) and transfer case shaft (5) with two
screws (3) and new locknuts (6).
4.
Move transfer case shift handle (10) through LOW, NEUTRAL, and HIGH positions and verify
correct installation of controls.
5.
Connect battery ground cable (WP 0126 00).
6.
Release parking brake and remove wheel chocks (TM 9-2320-361-10).
Back to Top

