DMWR-9-2815-220 - Page 136 of 1422
DMWR 9·2815-220
5-12.
(Cont)
(7±
Starting at the main thRust bearIng cap, wIth AId of aN assIstaNt to holD
the Nuts on the opposIte side of craNkcAse²
³lteRNAteLy
tIghten AlL MiN
beARINg cAp engi´e cRANkcAse roD nuts to 640 pouNd µinches toRque¶·/
(8±
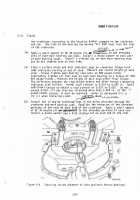
Check the Inside Diameter of the mAIn beAr¸ng cAps and the mAI´ thrust
bearing cAp with A d¹AL boRe inDicAtor as showN In fIguRe 5º6 (5»¼
±
agaINst the LImits specIFIed ½n O¾P's 87¿À
Á
ÂÁ
Ã
{5»
8
Ä
Å aND 732ÆÂ7¼Ç
)
5
ÈÉ
7
}
.
.
(9)
Êf BeARings ARe to Be
ReuseDË
DisassemBÌe caps aND INstaLL tHRust aND
mAiN BeaRiNg sLeeve hALvesÍ
ÎpreaD a thIn coat of ÏRussiAN blueÐ
ÑÊÒµP-30À0ÓÐ over steeL BAcks of upper A´d loweR ÔAin sleeve beArIng
halves to show the sLeeve beaRIng coNtact suRfAce with the ÕaiN Beari´g
boRe I´ crANkcase
¾nstaLL BeARings In theIR oRIginaL location iN cRa´kÖ
case aND mAIn ×eARing cAps.
NOTE
ØAIN BeARIng sLeeve haLves must be instAlleD in theIR orIgINAl locAtion
when they aRe to BeÙ ReuseDÍ
Use new BeaRIngs when A visual inspectIoN
iNDÚcAtes beArings are uNseRviceAbLe
ÛÜ0±
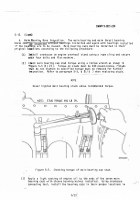
Check cLeaRANce BetweeN upper bearINg fLA´ge ANd crANkcaseÍ
ÊNstAlL
upper mAIN thRÝst sleeve BearIng Into Þo. Â mAI´ Bearing seAt of craNkß
case.
Øeàsure cLearAnce Between BeAri´g fLange AND cRankcAse usiNg
feeleR gAge Ûfág. 5µâ±
±
» 25±ã
CLeArAnce shouLD be 0.00Â to äå008
æ
InchÍ
SLeeV±
B²ARInG
\
±'
/
.
'³´-µ
-
-
²
³
\
I
i
tA034301
çIgère 5-éê
CheckIng cLearANce beTWeen beArINg flA´ge A´d crANkcAseë
À»25
Back to Top

