TM-5-5420-228-24 - Page 532 of 750
TM 5-5420-228-24
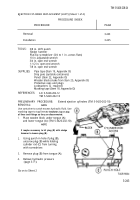
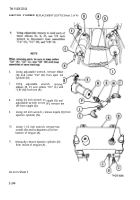
LOCKING CYLINDER REPLACEMENT (Sheet 2 of 3)
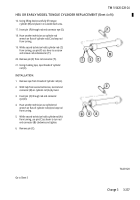
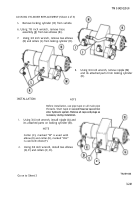
Remove locking cylinder (H) from vehicle.
5.
6.
Using 7/8 inch wrench, remove hose
assembly (J) from two elbows (K).
7.
Using 3/4 inch wrench, remove two elbows
(K) and collars (L) from locking cylinder (H).
8.
Using 3/4 inch wrench, remove nipple (M)
and its attached parts from locking cylinder
(H).
INSTALLATION:
NOTE
Before installation, use pipe tape on all male pipe
threads. Start tape on
second thread so tape will not
enter hydraulic system. Remove all caps and plugs as
necessary during installation.
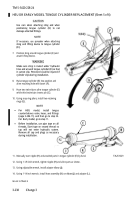
1.
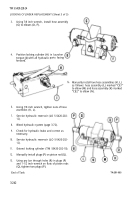
Using 3/4 inch wrench, install nipple (A) and
its attached parts on locking cylinder (B).
NOTE
Collar (C), marked “M” i
S
used with
elbow (D) and collar (E), marked “CE2”
is used with elbow (F).
2.
Using 3/4 inch wrench, install two elbows
(D, F) and collars (C, E).
Go on to Sheet 3
TA251632
3-241
Back to Top

