TM-9-2320-209-20-3-2 - Page 223 of 552
TM 9-2320-209-20-3- 2
c .
Replacement .
NOT E
Put anti-seize tape around fittings befor e
replacement .
1 .
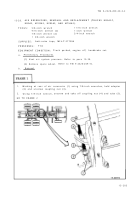
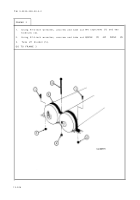
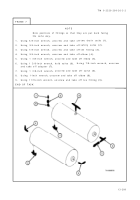
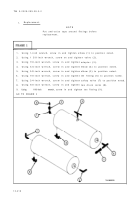
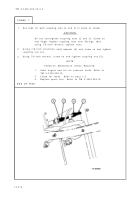
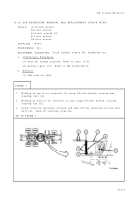
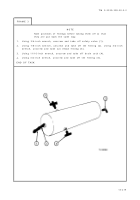
Using 1-inch wrench, screw in and tighten elbow (1) to position noted .
2 .
Using 1 3/8-inch wrench, screw on and tighten valve (2) .
3 .
Using 7/8-inch wrench, screw in and tighte n
4 .
Using 3/4-inch wrench, screw in and tighte n
5 .
Using 5/8-inch wrench, screw in and tighte n
6 .
Using 7/8-inch wrench, screw in and tighte n
7 .
Using 3/4-inch wrench, screw in and tighte n
8 .
Using 5/8-inch wrench, screw in and tighte n
adapter (3) .
elbow (4) to position noted .
elbow (5) to position noted .
tee fitting (6) to position noted .
safety valve (7) to position noted .
two drain cocks (8) .
9 .
Using
11/16-inch
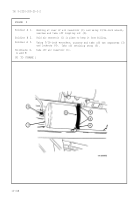
wrench, screw in and tighten tee fitting (9) .
GO TO FRAME 2
13-21 0
Back to Top

