TM-9-2320-260-34-1 - Page 642 of 657
TM 9-2320-260-34-1
Section III. AIR-HYDRAULIC SYSTEM MAINTENANCE
11-8. SERVICE BRAKE PEDAL LEVER AND BRACKET MAINTENANCE
THIS TASK COVERS:
a. Removal
c. Installation
b. Cleaning and Inspection
INITIAL SETUP
APPLICABLE MODELS
All
TOOLS
General mechanic’s tool kit
(Appendix B, Item 1)
Arbor press (Appendix B, Item 7)
MATERIALS/PARTS
Five locknuts (Appendix D, Item 166)
Four locknuts (Appendix D, Item 191)
Cap and plug set (Appendix C, Item 6)
Antiseize tape (Appendix C, Item 50)
REFERENCES (TM)
TM 9-243
TM 9-2320-260-10
TM 9-2320-260-20
TM 9-2320-260-34P-1
a. Removal
EQUIPMENT CONDITION
l Wheels chocked (TM 9-2320-260-10).
l Floorboard tunnel removed
(TM 9-2320-260-20).
l Brake pedal removed (TM 9-2320-260-20).
l Clutch pedal removed (TM 9-2320-260-20).
l Clutch actuating lever link rod assembly removed
(TM 9-2320-260-20).
l Master cylinder removed (TM 9-2320-260-20).
l Transfer-to-front axle propeller shaft removed
(TM 9-2320-260-20).
l Air reservoirs drained (TM 9-2320-260-10).
GENERAL SAFETY INSTRUCTIONS
l Drain air reservoir before disconnecting air lines.
l Eyeshields must be worn when removing
hydraulic lines.
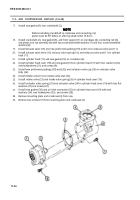
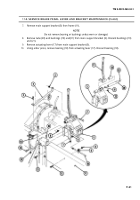
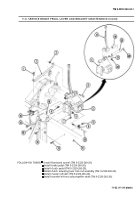
1. Remove screw (4) and locknut (3) from lever support (2) and main support bracket (5). Discard
locknut (3).
2. Remove screw (1), locknut (14), and lever support (2) from frame (11). Discard locknut (14).
3. Remove screw (12), locknut (8), and bracket (9) from frame (11). Discard locknut (8).
4. Remove lubrication fittings (22) from main support bracket (5).
WARNING
l Eye protection is required when removing hydraulic lines.
Failure to do so may result in injury to personnel.
l Drain air reservoirs before disconnecting air lines. Small parts
under pressure may shoot out with high velocity, causing injury
to personnel.
CAUTION
Cap or plug hydraulic lines after removal. Remove plugs prior to
installation. Failure to do so may result in damage to equipment.
5. Remove hydraulic line (10) from tee (15).
6. Remove four locknuts (6), screws (13), two locknuts (7), and screws (16) from main support
bracket (5) and frame (11). Discard locknuts (6) and (7).
11-30
Back to Top


