TM-9-2320-361-34 - Page 61 of 764
TM 9-2320-361-34
3-4. VIBRATION DAMPER AND SEAL MAINTENANCE
THIS TASK COVERS:
a. Removal
c. Installation
b.
Cleaning and Inspection
INITIAL SETUP
APPLICABLE MODELS
All
TOOLS
General mechanic’s tool kit (Appendix B, Item 1)
Torque wrench, 3/4-in. dr. (Appendix B, Item 6)
1-5/8-in. socket, 3/4-in. dr. (Appendix B, Item 45)
Handle, socket wrench, 3/4-in. dr.
(Appendix B, Item 46)
Mechanical puller (Appendix B, Item 22)
Magnetic particle equipment
(Appendix B, Item 63)
REFERENCES
TM 9-2320-361-10
TM 9-2320-361-20
TM 9-2320-361-34P
EQUIMENT CONDITION
●
Parking brake set (TM 9-2320-361-10).
●
Fuel shutoff valve disconnected
(TM 9-2320-361-10).
●
Vehicle in fifth gear (TM 9-2320-361-10).
●
Battery ground cable disconnected
(TM 9-2320-361-20).
SPECIAL TOOLS
●
Radiator removed (TM 9-2320-361-20).
Crankshaft driver (Appendix B, Item 48)
●
Drivebelts removed (TM 9-2320-361-20).
Oil seal inserter (Appendix B, Item 47)
GENERAL SAFETY INSTRUCTIONS
MATERIALS/PARTS
Hand protection must be worn at all times when
Seal (Appendix F, Item 220)
handling heated vibration damper and pulley.
Two lockwashers (Appendix F, Item 123)
Lubricating oil OE/HDO 30
(Appendix C, Item 13)
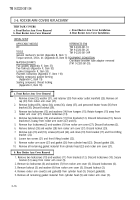
1. Remove two screws (9), lockwashers (10), and lockplate (8) from vibration damper and pulley (6).
Discard lockwashers (10).
a. Removal
2. Remove retainer bolt (7) and washer (1) from crankshaft (4) and vibration damper and pulley (6).
3. Remove vibration damper and pulley (6) from crankshaft (4) and timing cover (5).
4. Remove plug (2) from key way (3) of crankshaft (4).
5. Install retainer bolt (7) in end of crankshaft (4) and turn until key (3) position is approximately
12 o’clock. Remove retainer bolt (7).
6. Using mechanical puller, remove oil seal (11) from timing cover (5). Discard oil seal (11).
I
b.
Cleaning and Inspection
1.
2.
3.
4.
5.
6.
3-10
For general cleaning instructions, refer to para. 2-8
Visually inspect vibration damper and pulley (6) for nicks, cracks, or damage. Replace vibration
damper and pulley (6) if damaged.
Inspect exposed section of key (3) on crankshaft (4) for looseness or damage. Remove engine
(para. 3-20) and replace crankshaft (4) if defective.
Hold rear half of vibration damper (6) on floor with your feet. Try to turn vibration damper and
pulley (6). Replace vibration damper and pulley (6) if loose.
Inspect threads of two puller screw holes for damage. Fix minor thread damage with tap if damaged.
Replace vibration damper and pulley (16) if damaged beyond repair.
Inspect lockplate (8) for cracks or damage. Replace lockplate (8) if cracked or damaged.
Back to Top


