TM-9-2320-387-24-1 - Page 1106 of 1205
TM
9-2320-387-24-
1
i 8-25. POWER STEERING SYSTEM HYDRAULIC CONTROL VALVE MAINTENANCE
This task covers:
a. Removal
b. Back
Flush Procedure
c. Inspection
d. Installation
INITIAL
SETUP:
Tools
General mechanic’s tool kit:
automotive (Appendix
B, Item 1)
Maintenance and repair shop equipment:
automotive (Appendix B, Item 2)
Manual References
TM 9-2320-387-10
TM 9-2320-387-24P
Equipment Condition
l
Battery ground cables disconnected (para. 4-68).
l
Hood raised and secured (TM 9-2320-387-10).
General Safety
Instructions
Do not drain fluid when engine is hot.
Maintenance Level
unit
NOTE
If referred here fi-om chapter 2 troubleshooting instructions to
perform back flush procedure, follow steps 1 through 4 and then
proceed to task b.
WARNING
Do not drain fluid when engine is hot. Severe injury to personnel
will result.
CAUTION
Cover or plug all hoses and connections immediately after
disconnection to prevent contamination. Remove all plugs prior to
connection.
NOTE
l
Note location of hoses for installation.
l
Have drainage container ready to catch fluid.
1.
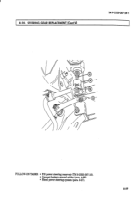
Loosen clamp (2) and disconnect power steering return line hose (1) from control valve elbow (4).
2.
Loosen clamp (11) and disconnect fan clutch hose (12)
from
control valve fitting (10).
3.
Loosen clamp (14) and disconnect steering gear hose (13) from control valve elbow (3).
4.
Disconnect time-delay module connector (6) from control valve connector (7).
5.
Loosen clamp (5) and remove control valve (8) from bracket (9).
b.
Back Flush Procedure
1.
Connect battery ground cables (para. 4-68).
2.
Install steering gear hose (13) on control valve fitting (10).
3.
Remove control valve elbow (4) from control valve (8) and install pipe plug (15) (NSN 4730-00-011-2578)
on control valve (8).
4.
Install drain hose (16) (make f?orn NSN 4720-01-1862358,36 in. (91.4 cm) long) on control valve elbow (3).
5.
Place drainage container underneath drain hose (16) to catch fluid.
8-68
Back to Top


