TM-9-2815-200-35
ENGINE, WITH CONTAINER:TURBOSUPERCHARGED, DIESEL ,FUEL INJECTION ,90-DEGREE “V” TYPE, AIR - COOLED ,12 - CYLINDER , ASSEMBLY ;MODELS AVDS-1790-2M (2815-856-4996), AVDS-1790-2A AND AVDS-1790-2AM (2815-856-9005)
TECHNICAL MANUAL; DIRECT SUPPORT, GENERAL SUPPORT AND DEPOT MAINTENANCE MANUAL INCLUDING REPAIR PARTS AND SPECIAL TOOLS LISTS
TM-9-2815-200-35 - Page 349 of 779
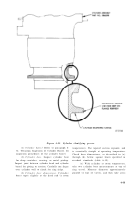
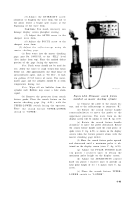
Figure 6-51. Cylinder identifying groove.
(1)
Cylinder barrel.
Refer to paragraph 6-
32. Ultrasonic Inspection of Cylinder Barrel, for
inspection procedures of the cylinder barrel.
(2)
Cylinder bore.
Inspect cylinder bore
for deep scratches,
scoring, or metal pickup.
Inspect joint between cylinder head and cylinder
barrel for pitting or erosion. Carefully run finger
over cylinder wall to check for ring ridge.
(3)
Cylinder bore dimensions.
Cylinde r
bores taper slightly at the head end (a room
temperature). The tapered section expands, and
is essentially straight at operating temperature.
Check bore dimensions, as described in (a )
through (d), below, against limits specified in
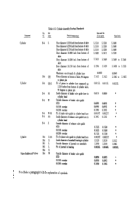
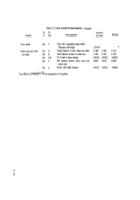
overhaul standards (table 6-15).
(a) With cylinder at room temperature,
take two cylinder bore measurements at top of
ring travel. Measure diameter approximately
parallel to line of valves, and then take cross
6-55
Back to Top

