TM-9-2815-200-35
ENGINE, WITH CONTAINER:TURBOSUPERCHARGED, DIESEL ,FUEL INJECTION ,90-DEGREE “V” TYPE, AIR - COOLED ,12 - CYLINDER , ASSEMBLY ;MODELS AVDS-1790-2M (2815-856-4996), AVDS-1790-2A AND AVDS-1790-2AM (2815-856-9005)
TECHNICAL MANUAL; DIRECT SUPPORT, GENERAL SUPPORT AND DEPOT MAINTENANCE MANUAL INCLUDING REPAIR PARTS AND SPECIAL TOOLS LISTS
TM-9-2815-200-35 - Page 365 of 779
proximately 4 inches long and slotted at 0.80
inch intervals 15 degrees to the horizontal to a
depth of 0.12 inch from the bottom of the stone.
The stones are mounted to 1 / 16 inch thick cork
backing before mounting in the shell. Thi s
design allows the stone to conform to the tapered
section of the bore. The stones should b e
mounted as per Micromatic Design No. 47415 -
SA or equivalent. This number represents size
7 / 16 x 1 / 2 x 4 stones mounted with cork
backing and slotted. This design will fi t
Micromatic stone holder No. 33960-5 an d
Micromatic Model 5R-SFE-8 Blind End Tool.
(2) The surface finish should be devel-
oped in two stages. Rough hone the entir e
length of the bore, using moderately heavy stone
pressure, until the ring ridge is removed and
entire bore has a cross hatch pattern. Finish hone
using the same stones, with a very light pressure,
for approximately 5 to 8 strokes. This operation
will remove rough edges and fragmented metal
left from the rough hone operation.
Note.
The ring ridge may be removed using
short stones and a short stroking action prior to
the full rough and finish hone cycle. Under no
circumstances are short cycle strokes to b e
performed after the full length strokes have been
completed.
(3) Honing oil should be principall y
kerosene with a sulphurized base oil. Adequate
filtration should be provided with both magnetic
and paper filters recommended. A suggested oil
is twenty-seven and one half (27-1 / 2) parts
kerosene to twenty-two and one half (22-1 / 2
parts Stuarts’ Superkool base oil. This may be
purchased from the D. A. Stuart Oil Company,
8350 Military Avenue, Detroit, Michiga n
48204. )
(4) The hone angle should be 35 degrees
to horizontal (70 degrees included angle) .
Spindle speed should be 77 rpm, with a vertical
reciprocating rate of 43 cycles per minute.
(5) When diameter of bore at top of ring
travel is more than 5.7610 inches after honing,
replace cylinder.
(6) Clean cylinder with a power brush
and hot (160°F) soapy water. Dry thoroughly.
Lubricate cylinder bore to prevent rust.
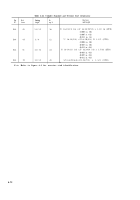
e. Camshaft Bearings.
Remove minor nicks,
burs, or scratches from camshaft bearing sur-
faces with crocus cloth dipped in dry-cleaning
solvent or mineral spirits paint thinner. Replace
cylinder assembly when camshaft bearin g
surfaces are scored, galled, or deeply pitted, or
when they do not conform to limits specified in
overhaul standards (table 6-15).
f. Cylinder Exterior.
(1)
Cooling fins.
Straighten bent fins as
near as possible to their original spacing .
Replace cylinder assembly when more than one
percent of barrel cooling fin area is broken.
Replace cylinder assembly if head finis broken
more than half the depth of the fin or more than
two inches long.
A cylinder assembly can be
used if it has not more than three acceptable
defects, or if no two of the defects are on adjacent
fins. Repair damaged cylinder head fins a s
described in (a) through (c), below, and in TB
9-2800-207-50.
(a) Use a fine mill file to remove sharp
corners of broken head fins.
(b) Do not remove more metal than
necessary to produce a smoothly blended edge on
the damaged fin.
(c) Depth of any blended fin must not be
less than 50 percent of its original depth, when
blended fin is less than 50 percent of original
depth, replace cylinder assembly.
(2)
Studs and inserts.
Replace damaged ,
bent, or stripped studs as described in paragraph
6-4e and table 6-16. Replace defective helical-
coil inserts as described in paragraph 6-5.
6-71
Back to Top


