TB-9-2320-279-13-P-2 - Page 343 of 460
II106700-5
Rev. B
Page 79
5.1.11
Re-Install the LH and RH Door-Mounted Outside Mirrors
a.
Position the LH outside mirror frame and mirror on the outside of the LH door.
b.
Apply Loctite 242 to four bolts (1/4 – 20 x 1.750 LG).
c.
Attach the mirror frame to the door using the four prepared bolts
(1/4 – 20 x 1.750 LG), four flat washers (1/4 ID), and four locknuts (1/4 – 20).
d.
Torque the locknuts to 9 ft-lb.
e.
Repeat Steps “a” through “d” for the RH Door-Mounted Outside Mirror.
5.1.12
Re-Install the Cab Steps (with the Internal Clearance Light)
a.
Apply Loctite 242 to four bolts (5/16 – 18 x 1.250 LG).
b.
Position the hard metal cab step onto the bottom surface of the driver’s-side Blast
Deflector using the four previously prepared bolts (5/16 – 18 x 1.500 LG),
eight washers (5/16 ID), and four locknuts (5/16 – 18).
Torque the locknuts to
18 ft-lb.
c.
Plug the wiring harness into the Clearance Light.
Use the extra Pigtail Harness (P/N
111438-3) supplied in the Side Armor Panel Kit, P/N 103703-9, -10.
d.
Repeat Steps “a” through “c” for the passenger-side cab step.
5.1.13
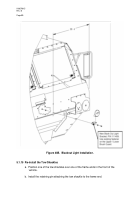
Re-install the Blackout Light
a.
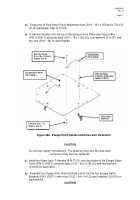
Remove the Blackout Light from the old bracket and install it in the new bracket,
(P/N 111459-1), using the same hardware (see Figure 48B).
b.
Extend the vehicle Blackout Light wiring connection using the Pigtail Harness,
(P/N 111438-3) supplied in the Front Armor Protection Kit, P/N 106705-3.
c.
Re-connect the vehicle Blackout Light wire connection using the Pigtail Harness,
(P/N 111438-3)
5.1.14
Re-Install the Bridge Weight Sign
a.
Re-install the Bridge Weight Sign over the holes provided on the passenger side of
the Upper Brush Guard Cover (P/N 111437-1) and secure it in place using two bolts
(1/4 – 20 x 1.250 LG), four flat washers (1/4 ID), and two locknuts (1/4 – 20) (See
Figure 49).
d.
Torque the two locknuts to 9 ft-lb.
Back to Top


