TM-9-2320-260-34-2 - Page 755 of 863
17-21. PERSONNEL HEATER BURNER MAINTENANCE
THIS TASK COVERS:
a. Removal
d. Assembly
b. Disassembly
e. Installation
c. Cleaning and Inspection
INITIAL SETUP
APPLICABLE MODELS
MATERIALS/PARTS (Contd)
All
Drycleaning solvent (Appendix C, Item 48)
Rag (Appendix C, Item 32)
TOOLS
Wire (Appendix C, Item 59)
General mechanic’s tool kit
(Appendix B, Item 1)
REFERENCES (TM)
MATERIALS/PARTS
TM 9-2320-260-34P-2
Nut-assembled lockwashers
EQUIPMENT CONDITION
(Appendix D, Item 264)
Personnel heater fuel line and blower housing
Nut-assembled lockwasher
(Appendix D, Item 265)
removed (para. 17-19).
Three lockwashers (Appendix D, Item 209)
GENERAL SAFETY INSTRUCTIONS
Lockwasher (Appendix D, Item 212)
●
Keep fire extinguisher nearby when using
TWO
fiber washers (late model heaters)
(Appendix D, Item 536)
drycleaning solvent.
●
Eye protection is required when using wire brush
Fiber washer (early model heaters)
(Appendix D, Item 537)
for cleaning.
●
Compressed air source will not exceed 30 psi
Fiber washer (Appendix D, Item 539)
(207 kPa).
O-ring (Appendix D, Item 283)
●
Eyeshields must be worn when cleaning with
Gasket (Appendix D, Item 82)
compressed air.
Wick (Appendix D, Item 542)
NOTE
The burner is removed the same for early and late model heaters.
This procedure is for early model heaters.
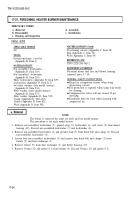
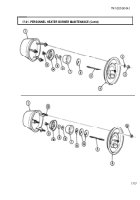
1. Remove nut-assembled lockwasher (7), ground strap (5), lockwasher (6), and screw (8) from heater
housing (10). Discard nut-assembled lockwasher (7) and lockwasher (6).
2. Remove nut-assembled lockwasher (4) and ground strap (5) from hook bolt and clamp (2). Discard
nut-assembled lockwasher (4).
3. Loosen four nut-assembled lockwashers (3) and remove four hook bolt and clamps (2) from
burner (9) and heat exchanger (1).
4. Remove burner (9) from heat exchanger (1) and heater housing (10).
5. Remove O-ring (12) and gasket (11) from burner (9). Discard O-ring (12) and gasket (11).
17-54
TM 9-2320-260-34-2
Back to Top


