TM-9-2320-272-23-5 - Page 331 of 623
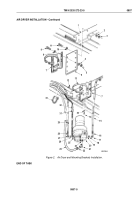
MOUNTING BRACKETS REMOVAL
NOTE
This task covers M939/A1/A2 air dryer support brackets and air dryer mounting brackets.
M936 wreckers use the same air dryer support brackets and only four mounting screws,
locknuts, and eight washers.
1.
Remove four locknuts (Figure 2, Item 5), washers (Figure 2, Item 4), screws (Figure 2, Item 9), washers
(Figure
2, Item 8), and air dryer support bracket (Figure 2, Item 7) from air dryer mounting bracket
(Figure
2,
Item
6). Discard locknuts.
2.
Remove four locknuts (Figure 2, Item 3), washers (Figure 2, Item 2), screws (Figure 2, Item 11), washers
(Figure 2, Item 10), and air dryer mounting bracket (Figure 2, Item 6) from crossmember (Figure 2, Item 1).
Discard locknuts.
END OF TASK
MOUNTING BRACKETS INSTALLATION
1.
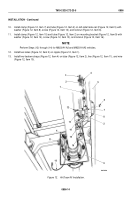
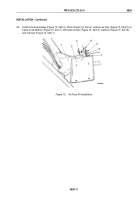
Install air dryer mounting bracket (Figure 2, Item 6) on crossmember (Figure 2, Item 1) with four washers
(Figure 2, Item 10), screws (Figure 2, Item 11), washers (Figure 2, Item 2), and locknuts (Figure 2, Item 3).
2.
Install air dryer support bracket (Figure 2, Item 7) on air dryer mounting bracket (Figure 2, Item 6) with four
washers (Figure 2, Item 8), screws (Figure 2, Item 9), washers (Figure 2, Item 4), and locknuts
(Figure
2,
Item
5).
END OF TASK
AIR DRYER INSTALLATION
NOTE
Apply sealing compound to all male pipe threads before installation.
1.
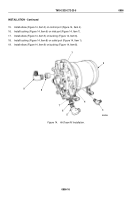
Install elbow (Figure 2, Item 21) in outlet port (Figure 2, Item 23) on bottom of air dryer housing
(Figure
2,
Item
20).
2.
Install adapter (Figure 2, Item 26) and elbow (Figure 2, Item 27) in governor control port (Figure 2, Item 25)
on side of air dryer housing (Figure 2, Item 20).
3.
Install adapter (Figure 2, Item 18) and elbow (Figure 2, Item 17) in inlet port (Figure 2, Item 19) on side of air
dryer housing (Figure 2, Item 20).
4.
Install lockwasher (Figure 2, Item 30) and screw (Figure 2, Item 14) in bottom of air dryer support bracket
(Figure 2, Item 7) and air dryer housing (Figure 2, Item 20). Tighten screw 20 to 35 lb-ft (27 to 47 N·m).
5.
Install air dryer housing (Figure 2, Item 20) on air dryer support bracket (Figure 2, Item 7) with clamp
(Figure
2, Item 13) and nut (Figure 2, Item 12) and tighten nut on clamp.
6.
Install governor air supply line (Figure 2, Item 29) on elbow (Figure 2, Item 27) and tighten nut
(Figure
2,
Item
28).
7.
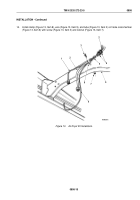
Install air outlet supply line (Figure 2, Item 24) on elbow (Figure 2, Item 21) and tighten nut (Figure 2, Item 22).
8.
Install air inlet supply line (Figure 2, Item 15) on elbow (Figure 2, Item 17) and tighten nut (Figure 2, Item 16).
9.
Connect air dryer heater connector (Figure 2, Item 31) to ABS wiring connector (Figure 2, Item 32) and install
two tiedown straps (Figure 2, Item 33).
TM 9-2320-272-23-5
0807
0807-4
Back to Top

