TM-9-2320-272-24-1 - Page 213 of 1015
TM 9-2320-272-24-1
Table 2-3. Electrical Troubleshooting (Contd).
MALFUNCTION
TEST OR INSPECTION
CORRECTIVE ACTION
16. LAMPS WILL NOT LIGHT
Test 1. Check for defective bulb.
a. Replace bulb with one known to be good.
b.
If bulb does not light, go to test 2.
Test 2. Check for corrosion or dirt in sockets or on terminals.
a. Clean corroded connections.
b. Clean dirt from sockets and terminals.
Test 3. Check lamp holders for loose connections and broken wire terminals.
a. Tighten all loose connections.
b. Repair or replace broken wire terminals (para. 3-131).
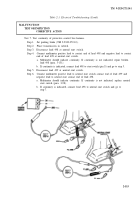
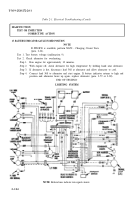
Test 4. Test lighting system harness connector voltage.
Step 1.
Place battery switch to OFF position.
Step 2.
Remove light switch from instrument panel (para. 3-108).
Step 3.
Place battery switch to ON position.
Step 4.
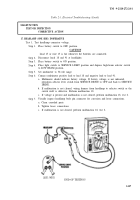
Set multimeter to 50-volt range.
Step 5.
Connect multimeter negative lead to vehicle chassis ground and positive lead to
connector socket pin F.
a. If battery voltage is not indicated, go to step 6.
b.
If battery voltage is indicated at socket pin F, connect a jumper wire from socket
pin F to socket of faulty lead as shown.
c.
If lamps lights with jumper wire connected, replace light switch (para. 3-108).
Step 6.
Check wiring harness for loose connections.
a. Tighten all loose connections.
b. Repair broken wiring harness (para. 3-131).
CAUTION
Lead 15 or wire 15 is hot whenever the batteries are connected.
2-125
Back to Top

