TM-9-2320-272-24-1 - Page 548 of 1015
3-62. SURGE
TM 9-2320-272-24-1
THIS TASK COVERS:
a. Removal
b. Installation
INITIAL SETUP:
APPLICABLE MODELS
REFERENCES (TM)
M939A2
TM 9-2320-272-10
TOOLS
TM 9-2320-272-24P
General mechanic’s tool kit (Appendix E, Item 1)
EQUIPMENT CONDITION
MATERIALS/PARTS
• Parking brake set (TM 9-2320-272-10).
• Hood raised and secured (TM 9-2320-272-10).
Two locknuts (Appendix D, Item 279)
• Cooling system drained as required (para. 3-53).
Tiedown straps (Appendix D, Item 685)
Antiseize tape (Appendix C, Item 72)
• Exhaust pipe removed (para. 3-50).
NOTE
Remove tiedown straps as necessary. Note location for installation.
1.
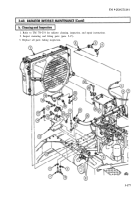
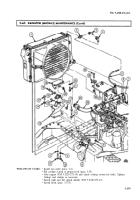
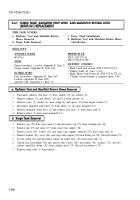
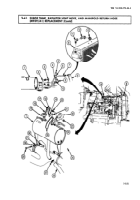
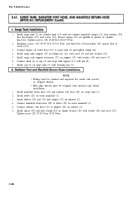
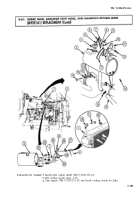
Loosen clamp (18) and disconnect hose (17) from surge tank (3).
2.
Loosen clamp (16) and disconnect hose (14) from surge tank (3).
3.
Loosen clamp (12) and disconnect hose (13) from surge tank (3).
4.
Remove fitting (4) from surge tank (3).
5.
Disconnect hose (11) from surge tank (3).
6.
Remove two locknuts (6), washers (5), screws (24), nuts (7), clamps (23), surge tank (3), and two
seats (22) from bracket (20). Discard locknuts (6).
7.
Remove cap (2), chain (1), and S-hook (25) from surge tank (3).
8.
Remove two screws (19), screw (10), and bracket (20) from engine (15).
9.
Remove nut (9), screw (21), and bracket (8) from bracket (20).
1.
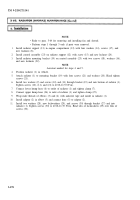
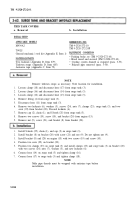
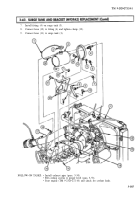
Install S-hook (25), chain (1), and cap (2) on surge tank (3).
2.
Install bracket (8) on bracket (20) with screw (21) and nut (9). Do not tighten nut (9).
3.
Install bracket (8) and (20) on engine (15) with two screws (19) and screw (10).
4.
Position two seats (22) on bracket (20).
5.
Position two clamps (23) on surge tank (3) and install clamps (23) and surge tank (3) on bracket (20)
with two screws (24), nuts (7), washers (5), and new locknuts (6).
6.
Connect hose (14) on surge tank (3) and tighten clamp (16).
7.
Connect hose (17) to surge tank (3) and tighten clamp (18).
NOTE
Male pipe threads must be wrapped with antiseize tape before
installation.
3-184
Back to Top

