TM-9-2320-280-20-2 - Page 222 of 951
4-5.8. (6.5L) 200 AMPERE DUAL VOLTAGE ALTERNATOR (12447109) CABLE REPLACEMENT
TM 9-2320-280-20-2
This task covers:
a. Removal
b. Installation
INITIAL SETUP:
Tools
General mechanic’s tool kit:
automotive (Appendix B, Item 1)
Maintenance and repair shop equipment:
automotive (Appendix B, Item 2)
Materials/Parts
Four tiedown straps (Appendix G, Item 309)
Lockwasher (Appendix G, Item 134)
Lockwasher (Appendix G, Item 186)
Lockwasher (Appendix G, Item 191)
Lockwasher (Appendix G, Item 150)
Manual References
TM 9-2320-280-10
TM 9-2320-280-24P
Equipment Condition
• Hood raised and secured (TM 9-2320-280-10).
• Battery ground cables disconnected (para. 4-73).
• Engine access cover removed (para. 10-15).
4-12.22
Change 3
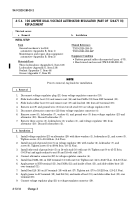
NOTE
Prior to removal, tag leads for installation.
1.
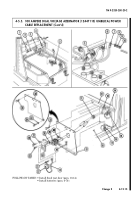
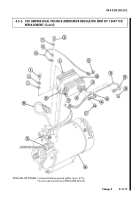
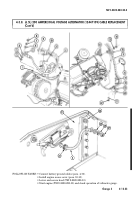
Slide back rubber boot (5) and remove nut (8), lockwasher (7), washer (6), cable (4), nut (3), and
washer (2) from positive stud (1). Discard lockwasher (7).
2.
Remove capscrew (9) and clamp (10) from water crossover bracket (11), and separate cable (4) from
cables and clamp (10).
3.
Remove nut (14), lockwasher (13), and clamp (15) from stud (12) and separate cable (4) from cables
and clamp (15). Discard lockwasher (13).
4.
Remove and discard four tiedown straps (16).
5.
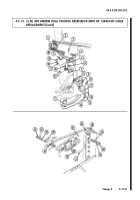
Remove nut (22), lockwasher (21), screw (17), and washer (18) from bracket (20) and remove
cable (4) from clamp (19). Discard lockwasher (21).
6.
Remove nut (27), lockwasher (26), washer (25), and cable (4) from buss bar (24) on battery box (23).
Discard lockwasher (26).
7.
Remove cable (4) through grommet (28) and vehicle.
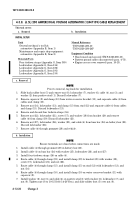
NOTE
Ensure terminals are clean before connections are made.
1.
Install cable (4) through grommet (28) in battery box (23).
2.
Install cable (4) on buss bar (24) with washer (25), lockwasher (26), and nut (27).
3.
Install four tiedown straps (16) on cable (4).
4.
Route cable (4) through clamp (19), and install clamp (19) to bracket (20) with washer (18),
screw (17), lockwasher (21), and nut (22).
5.
Route cable (4) through clamp (15), and install clamp (15) on stud (12) with lockwasher (13), and
nut (14).
6.
Route cable (4) through clamp (10), and install clamp (10) on water crossover bracket (11) with
capscrew (9).
7.
Install washer (2), nut (3), and cable (4) on positive stud (1) with washer (6), lockwasher (7), and
nut (8). Tighten nut (8) to 10-15 lb-ft (14-20 N
•
m), and slide rubber boot (5) over nut (8).
b. Installation
a. Removal
Back to Top


