TM-9-2320-280-20-2 - Page 470 of 951
4-103. WIRING HARNESS DUCT ASSEMBLY REPLACEMENT
This task covers:
a. Spotlight Branch Duct Removal
c. Main Duct Installation
b. Main Duct Removal
d. Spotlight Branch Duct Installation
INITIAL SETUP:
Applicable Models
M996, M996A1, M997, M997A1, M997A2
Tools
General mechanic’s tool kit:
automotive (Appendix B, Item 1)
Manual References
TM 9-2320-280-10
TM 9-2320-280-24P
Equipment Condition
Battery ground cable disconnected (para. 4-73).
TM 9-2320-280-20-2
4-232
Change 3
NOTE
Harness duct replacement for M996, M996A1, M997, M997A1,
and M997A2 are basically the same. This procedure covers M996
and M996A1 models only.
1.
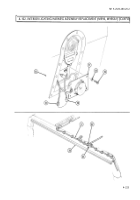
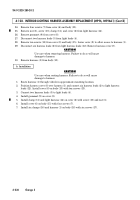
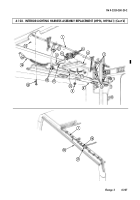
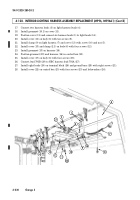
Remove four screws (12) from duct (2), clamp (3), and ceiling (4) and pull duct (2) away from
ceiling (4) for access to spotlight harness clamp (5).
2.
Remove screw (11), nut (6), and spotlight wiring clamp (5) from duct (2).
NOTE
• Spotlight branch duct must be removed before removing main
duct. Main duct must be installed before installing spotlight
branch duct.
• Prior to removal, tag leads for installation.
1.
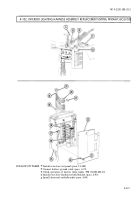
Remove ten screws (8) from duct (7) and ceiling (4) and pull duct (7) away for access to wiring
harness leads (1).
2.
Disconnect six light assembly leads (9) from wiring harness leads (1) and remove duct (7).
3.
Remove two ceiling lights (10) and blackout light (13) (para. 4-87).
4.
Inspect grommet (11.1) for damage. Replace if damaged.
1.
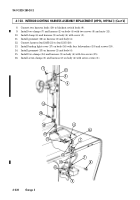
Install two ceiling lights (10) and blackout light (13) (para. 4-87).
2.
Connect six light assembly leads (9) to wiring harness leads (1).
3.
Install duct (7) on ceiling (4) with ten screws (8)
1.
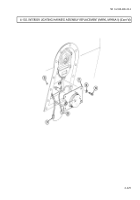
Install spotlight harness clamp (5) on duct (2) with screw (11) and nut (6).
2.
Install duct (2) and clamp (3) on ceiling (4) with four screws (12).
d. Spotlight Branch Duct Installation
c. Main Duct Installation
b. Main Duct Removal
a. Spotlight Branch Duct Removal
Back to Top

