TM-9-2320-280-20-2 - Page 628 of 951
5-26. TRANSFER CASE OIL SEALS REPLACEMENT
This task covers:
a. Front Oil Seal Removal
c. Rear Oil Seal Removal
b. Front Oil Seal Installation
d. Rear Oil Seal Installation
a. Front Oil Seal Removal
NOTE
Removal and installation procedures are basically the same for
model 218 front and rear oil seals and model 242 front oil seal.
This procedure covers the front oil seal. For replacement of rear
oil seal for model 242, refer to para. 5-26.c.
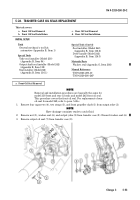
1.
Remove four capscrews (4), two straps (3), and front propeller shaft (1) from output yoke (2).
NOTE
Have drainage container ready to catch fluid.
2.
Remove nut (5), washer seal (6), and output yoke (2) from transfer case (8). Discard washer seal (6).
3.
Remove output oil seal (7) from transfer case (8).
INITIAL SETUP:
Tools
General mechanic's tool kit:
automotive (Appendix B, Item 1)
Special Tools
Yoke seal installer (Model 218)
(Appendix B, Item 94)
Output shaft seal installer (Model 242)
(Appendix B, Item 112)
Seal installer (Model 242)
(Appendix B, Item 116.1)
Special Tools (Cont’d)
Seal installer (Model 242)
(Appendix B, Item 116.2)
Drive handle (Model 242)
(Appendix B, Item 116.3)
Materials/Parts
Washer seal (Appendix G, Item 292)
Manual References
TM 9-2320-280-10
TM 9-2320-280-24P
TM 9-2320-280-20-2
Change 3
5-53
Back to Top

