TM-9-2320-280-20-2 - Page 848 of 951
TM 9-2320-280-20-2
8-48
Change 3
8-15. CENTER LINK REPLACEMENT
INITIAL SETUP:
Tools
General mechanic’s tool kit:
automotive (Appendix B, Item
1)
Puller kit (Appendix B, Item 167)
Materials/Parts
Four cotter pins (Appendix G, Item 14)
Manual References
TM 9-2320-280-24P
Equipment Condition
Front of vehicle raised and supported (para. 8-2).
This task covers:
a. Removal
b. Installation
CAUTION
Use of a pickle fork in lieu of puller kit may damage serviceable
components (boots).
1.
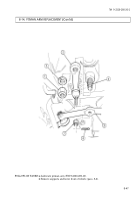
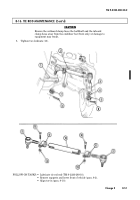
Remove cotter pin (5) and slotted nut (4) from idler arm (8) and center link (3). Discard cotter
pin (5).
2.
Remove cotter pin (9) and slotted nut (10) from pitman arm (2) and center link (3). Discard cotter
pin (9).
3.
Remove two cotter pins (1) and slotted nuts (6) from two tie rods (7) and center link (3). Discard
cotter pins (1).
4.
Using puller, remove center link (3) from two tie rods (7), idler arm (8), and pitman arm (2).
CAUTION
Do not loosen slotted nut to install cotter pin. Doing this may
result in damage to equipment.
1.
Install center link (3) on pitman arm (2) and idler arm (8) with slotted nuts (4) and (10). Tighten
slotted nuts (4) and (10) to 80 lb-ft (108 N
•
m).
2.
Install cotter pins (5) and (9) in slotted nuts (4) and (10).
3.
Install two tie rods (7) to center link (3) with two slotted nuts (6). Tighten slotted nuts (6) to 70 lb-ft
(95 N
•
m).
4.
Install two cotter pins (1) in slotted nuts (6).
b. Installation
a. Removal
Back to Top

