TM-9-2320-280-20-3 - Page 627 of 1168
12-24.1. 100/200 AMPERE DUAL VOLTAGE ALTERNATOR AND REGULATOR
CONVERSION
This task covers:
a. Part Fabrication
c. 200 Ampere Dual Voltage Alternator and Regulator
b. 100 Ampere Dual Voltage Alternator and
Installation
and Regulator Installation
a. Part Fabrication
Refer to appendix D, figure D-121.
INITIAL SETUP:
Tools
General mechanic’s tool kit:
automotive (Appendix B, Item 1)
Materials/Parts
Grease (Appendix C, Item 25)
Sealant (Appendix C, Item 38)
Alternator (NSN 2920-01-907-0532)
Lockwasher (Appendix G, Item 134)
Lockwasher (Appendix G, Item 185)
Lockwasher (Appendix G, Item 186)
Lockwasher (Appendix G, Item 187)
Tiedown strap (Appendix G, Item 313)
Manual References
TM 9-2320-280-10
TM 9-2320-280-24P
Equipment Condition
• Battery ground cable disconnected (para. 4-73).
• Hood raised and secured (TM 9-2320-280-10).
• Regulator removed (para. 12-22).
• Alternator removed (para. 12-23).
TM 9-2320-280-20-3
12-34.2
Change 2
NOTE
This task is for single voltage vehicle systems (basic and “A1” models) only.
1.
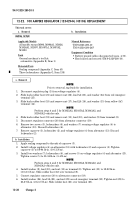
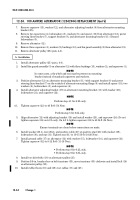
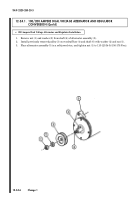
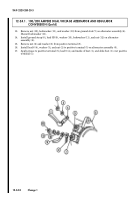
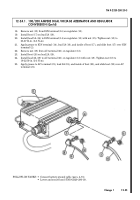
Remove nut (1), washer (2), and pulley (3) from shaft (6) on alternator assembly (5).
2.
Remove nut (1) and washer (2) from shaft (6) of replacement 100 ampere alternator assembly (5).
3.
Install previously removed pulley (3) on woodruff key (4) and shaft (6) with washer (2) and nut (1).
4.
Place alternator assembly (5) in a soft-jawed vise and tighten nut (1) to 120 lb-ft (163 N
•
m).
Remove alternator assembly (5) from vise.
b. 100 Ampere Dual Voltage Alternator and Regulator Installation
Back to Top

