TM-9-2320-328-13-P-2 - Page 607 of 1390
TM 9-2320-328-13&P-2
0192-3/(4 blank)
DRAFT
0192
INSTALLATION
1.
Install rubber draw latch (19) on water tank vent/fill tower (4) with screw (18) and locknut (17).
2.
Install bracket (16) on cover (9) with two screws (15) and two locknuts (14).
3.
Install hinge (8) on cover (9) with four screws (13), washers (12), lockwashers (11), and nuts (10).
4.
Install hinge (8) on water tank vent/fill tower (4) with three screws (7) and locknuts (6).
-
-
-
-
-
-
-
-
-
-
-
-
-
-
-
-
-
-
-
-
-
-
-
-
-
-
-
-
-
-
-
-
-
-
-
-
-
Adhesives, solvents, and sealing compounds can burn easily, can give off harmful
vapors, and are harmful to skin and clothing.
To avoid injury or death, keep away
from open fire and use in well-ventilated area.
If adhesive, solvent, or sealing
compound gets on skin or clothing, wash immediately with soap and water.
NOTE
Sealant will be applied to mating surface of water tank vent/fill tower and water tank.
5.
Apply sealant to base of water tank vent/fill tower (4).
6.
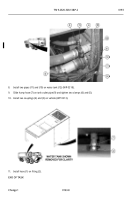
Install water tank vent/fill tower (4) to water tank (5) with eight washers (3), lockwashers (2), and screws (1).
7.
Tighten screws (1) to 20 lb-ft (27 N•m).
END OF TASK
FOLLOW-ON MAINTENANCE
Remove wheel chocks (TM 9-2320-422-10)
END OF TASK
END OF WORK PACKAGE
HWT0919
WARNING
ICON 30, 44, 27
Back to Top

