TM-9-2320-346-10 - Page 326 of 1184
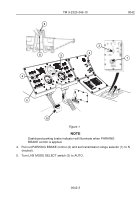
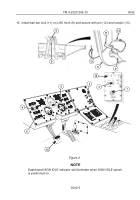
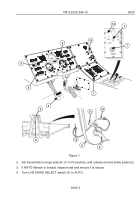
16. Set HIGH IDLE switch (6) to on position.
17. Release service brake pedal (10).
18. Move joystick (7) to LOAD. Allow vehicle to move underneath NATO flatrack. Ensure
NATO flatrack runners engage LHS rear rollers.
NOTE
Dashboard parking brake indicator will illuminate when PARKING
BRAKE control is applied.
19. Pull out PARKING BRAKE control (2) when NATO flatrack runners illuminate to LHS
rear rollers and NATO flatrack clears the ground.
20. Hold joystick (7) in LOAD position until NATO flatrack reaches stowed position.
NOTE
Dashboard HIGH IDLE indicator will go out when HIGH IDLE switch is
positioned off.
21. Set HIGH IDLE switch (6) to OFF position.
WARNING
When NO TRANSIT indicator is illuminated, vehicle may be maneuvered
in the immediate vicinity of the loading/unloading site. However, vehicle
is unsafe for road travel. Do not perform open-road driving when NO
TRANSIT indicator is illuminated. Failure to comply may result in injury
or death to personnel and damage to equipment.
22. Release joystick (7) when hook is fully stowed and NO TRANSIT indicator (14) light has
gone out.
23. Set HYD ENABLE switch (4) to off position. MAIN HYD ENABLE indicator (5) will go
out.
CAUTION
While maneuvering vehicle in the immediate vicinity of the loading or un-
loading site, LHS MODE SELECT switch may be in any setting. However,
LHS MODE SELECT switch must be set to OFF/TRANSPORT prior to
road travel, to prevent damage to main frame and hook arm cylinders.
TM 9-2320-346-10
0042
0042-6
Back to Top


