TM-9-2815-220-24 - Page 1152 of 1563
TM 9-2815-220-24
CRANKSHAFT MAIN BEARINGS INSPECTION
0138 00
INSPECTION (Continued)
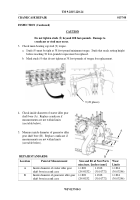
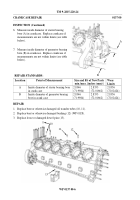
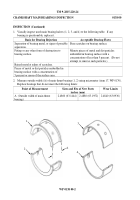
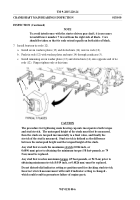
1. Visually inspect used main bearing halves (1, 2, 3, and 4) to the following table.
If any
bearing is questionable, replace it.
Basis for Bearing Rejection
Acceptable Bearing Flaws
Separation of bearing metal, or signs of possible
separation.
Fine scratches on bearing surface.
Pitting or any other form of destruction to
bearing surface.
Minute pieces of metal and dirt particles
embedded in bearing surface with a
concentration of less than 5 percent.
(Do not
attempt to remove such particles.)
Raised metal at edges of scratches.
Pieces of metal or dirt particles embedded in
bearing surface with a concentration of
5 percent or more of the surface area.
2. Measure outside width (A) of main thrust bearing (1, 2) using micrometer (item 17, WP 0176).
Replace bearings that do not meet the following limits:
Point of Measurement
Sizes and Fits of New Parts
inches (mm)
Wear Limits
A
(Outside width of main thrust
bearing)
2.4860 (63.1444)
2.4880 (63.1952)
2.4840 (63.0936)
A
4
3
2
1
WP 0138 00-2
Back to Top

