TB-43-0209 - Page 29 of 406
TB 43-0209
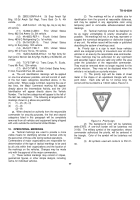
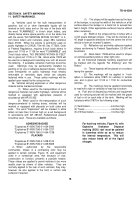
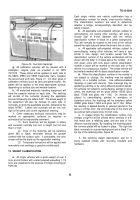
Figure 22.
Vehicle weight classification sign installed.
g.
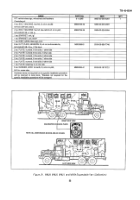
In addition, a replacement kit itemized below, is
authorized for the replacement of lost or damaged
numeral plates and retaining plates:
Name
National Stock No.
KIT: Retaining and
Numeral Plate
Replacement, for Vehicle
Class Signs
Consisting of:
1 each PLATE: numeral, 0
one side, 1 other side
1 each PLATE: numeral, 2
one side, 3 other side
1 each PLATE: numeral, 4
one side, 5 other side
1 each PLATE: numeral, 6
one side, 7 other side
1 each PLATE: numeral, 8
one side, 9 other side
1 each PLATE: retaining, C
on one side
h.
A vehicle weight classification sign kit, as
described herein, will be installed on the front of each
vehicle except:
(1)
All trailers.
(2)
Vehicles having a gross weight of 3 tons
or less.
(3)
Vehicles having standard classification
numbers higher than 99.
(4)
Vehicles having rated payloads of 3/4 to 1-
1/2 tons. This exception does not apply to vehicles
authorized for towing loads.
(5)
Vehicles with fixed loads (such as tanks,
self-propelled guns, etc.).
i.
Front classification signs for vehicles included in
h(3), (4), and (5) above, will be painted directly on the
vehicle.
Side classification signs, where applicable, will
also be painted directly on the vehicle.
j.
These vehicle weight classification sign kits can
be installed on vehicles in different ways.
For example,
in the case of Cargo Truck, the sign can be installed on
the brush guard, on the splash shield, or in an upright
position on the fender. The choice of method is left to the
using organization.
(1) Location.
(a)
The classification sign will be installed on
the vehicle in one of the following locations:
1. Right front fender.
2. Right side of brush guard.
3. Right front section of hull.
4. Right side of center front bumper splash shield.
(b) The sign will be placed below the driver’s line of
vision and will be positioned so that it will not block
headlamps, marker lights, blackout lights, air intakes,
etc.
(2) Installation.
(a)
On brush guard.
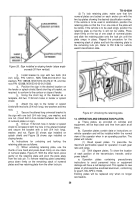
1. Paint the long universal bracket (channel) with
rust-inhibiting enamel.
2. After the enamel has dried, position the bracket
so that the two holes in the bracket align with two bolt
holes (9 o’clock positions) in the sign.
Assure that the
flat bearing surface of the bracket faces toward the sign.
Install one bolt (1-3/4 inches long) P/N 123798, NSN
5306-00-012-3798, one washer P/N 138538, NSN 5310-
00-272-4119, and one nut P/N 120368, NSN 5310-00-
012:
0368.
Turn nut two or three turns.
3. With the bracket in a vertical position, insert it
between two bars of the brush guard at the desired
location. With one hand, reach behind the brush guard
and adjust the bracket to a horizontal position.
With the
other hand, install another bolt (1-3/4 inches long),
washer, and nut.
Tighten both bolts, but apply only
enough torque to secure the sign to brush guard.
Excessive torque will cause the sign disk to bend.
Figure 22 shows the sign installed on brush guard.
CAUTION
If it is found that the vehicle classification sign
seriously obstructs airflow to the radiator, as
indicated by engine overheating, remove sign from
brush guard and install sign elsewhere.
24
Back to Top

