TB-9-2510-251-24 - Page 16 of 212
TB 9-2510-251-24
1-6
1-3.
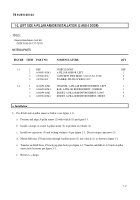
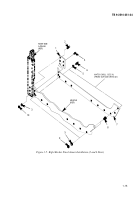
RIGHT SIDE A-PILLAR ARMOR INSTALLATION
(2 AND 4 DOOR)
TOOLS:
General mechanics tool kit:
(NSN 5180-00-177-7033)
MATERIAL/PARTS:
FIGURE
ITEM
PART NO.
NOMENCLATURE
QTY
1-3
1
REF
VEHICLE BODY
REF
2
6430686-01M1
A-PILLAR ARMOR, RIGHT
1
3
4397000-036
CAPSCREW, HEX HEAD, 0.312-18 X 1.25 IN.
2
4
4397004-007
WASHER, SPLIT LOCKING 0.312
2
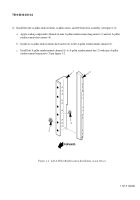
1-4
1
6430697-01M1
CHANNEL, A-PILLAR REINFORCEMENT, RIGHT
1
2
6430698-01M1
BAR, A-PILLAR REFORCEMENT, COMMON
1
3
6430699-01M1
INSERT, A-PILLAR REINFORCEMENT, LONG
9
4
6430700-01M1
INSERT, A-PILLAR REINFORCEMENT, SHORT
4
5
REF
VEHICLE BODY
REF
6
REF
A-PILLAR ARMOR, RIGHT
REF
7
REF
RIGHT DOOR ASSEMBLY (WITH DOOR HINGE ASSY)
REF
8
REF
DOOR HINGE COVER STRIP
REF
9
4397005-014
WASHER, FLAT, 0.375 IN.
9
10
4397000-062
CAPSCREW, HEX HEAD, 0.375-16 X 1.25 IN.
9
a. Installation
1)
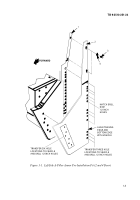
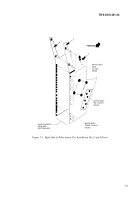
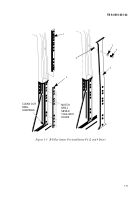
Pre-fit right side A-pillar armor as follows (see figure 1-3).
a.
Position and align A-pillar armor (2) with vehicle (1) per figure 1-3.
b.
Install c-clamps to secure A-pillar armor (2) in position on vehicle (1).
c.
Install two capscrews (3) and locking washers (4) per figure 1-3.
Do not torque capscrews (3).
d.
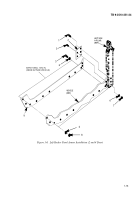
Match drill nine 1/2-inch holes into A-pillar as shown in figure 2-3.
Match drill six 1/2-inch holes from
A-pillar armor (2) through vehicle (1).
Match drill three 1/2-inch gap plate holes through vehicle (1).
e.
Remove c-clamps.
Back to Top

