TM-5-2330-378-14-P - Page 292 of 524
TM 5-2330-378-14&P
5-9.
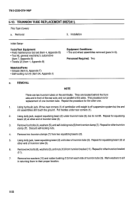
TRUNNIONTUBEAND BRACKETREPLACEMENT(M870).
ThisTaskCovers:
a.
Removal
b.
Installation
Initial Setup:
Toolsrrest
Equipment:
Equipment Conditions:
• Field maintenance too] set (Item 4 Appendix B)
Tire and wheel assembly removed (pare 3-9).
• Tool kit, general mechanic's:
automotive
(Item 7, Appendix 6)
Personnel Required:
Two
• Trestle (2) (Item 1, Appendix B)
Materials/Parts:
- Self-locking nut (12) (Item 34, Appendix 1)
a.
REMOVAL
NOTE
There are two trunnion tubes on the semitrailer. They are located behind the front
axle and in front of the rear axle, and run parallel to the axles. This procedure
is for
replacing one trunnion tube.
Repeat the procedure for the other one.
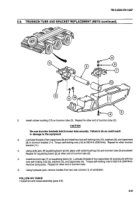
1 .
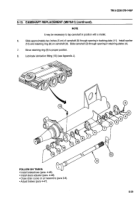
Using hydraulicjack, lifttwo rearcomers (1) of
semitrailer
until weight is off suspension
system
but tire and wheel assemblies still touch the
ground. Put trestles under corners (1).
2.
Using dolly jack, support equalizing beam (2)
under trunnion tube (3). Do not lift equalizing
beam (2). Repeat for equalizing beam (2) at
other end of trunnion tube (3).
3.
Remove four capscrews (4), washers (5), and self-locking nuts (6) from trunnion cap (7). Remove trunnion
cap (7) from equalizing beam (2). Repeat for equalizing beam (2) at other end of trunnion tube (3). Discard
self-locking
nuts.
4.
Using dolly jack, lower equalizing beam (2) until clear of trunnion tube (3). Repeat for equalizing beam (2) at
other end of trunnion tube (3).
5.
Remove two capscrews (8), washers (9), and self-locking nuts (10) from trunnion bracket (11). Repeatfor
other trunnion bracket (11). Discard self-locking nuts.
6.
Remove rubber bushing (12) from trunnion tube (3). Repeat for other end of trunnion tube (3).
7.
With the aid of an assistant, drive trunnion tube (3) out of two trunnion brackets (11).
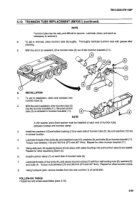
b.
INSTALLATION
1.
With the aid of an assistant, drive trunnion tube (3) into two trunnion brackets (11). Be sure trunnion tube
(3) is centered evenly in trunnion brackets (11).
5-30
Back to Top

