TM-5-3895-372-20 - Page 449 of 694
TM 5-3895-372-20
MIXER-AUGER SYSTEM.
9-12. RUBBER TROUGH MAINTENANCE (Continued).
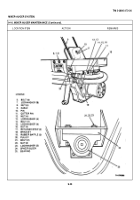
LOCATION/ITEM
ACTION
REMARKS
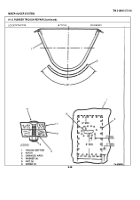
B. INSTALLATION.
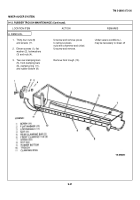
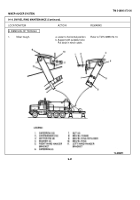
4.
Rubber bottom (9).
a.
Lay new rubber down on
wood backing.
b.
Place old rubber over new
rubber and mark holes.
c.
Remove old rubber.
d.
Using a 5/16 inch punch,
punch holes in new rubber.
NOTE
When installing and tightening screws, start at the front of trough (10) and work towards the rear.
5.
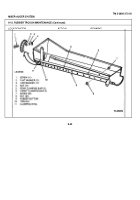
Rubber bottom (9)
a.
Place in trough (10).
Use C-clamps to hold in
(new).
b.
Aline holes with a punch. position.
6.
Two front clamping
Secure in position with
bars (6).
fourteen screws (7) and
nuts (8).
7.
Two rear clamping
Secure in position with
Remove Cclamps if used.
bars (5).
twenty screws (7) and
nuts (8).
8.
Clamping ring (11).
Secure in position with
eleven screws (1), flat
washers (2), lockwashers
(3), and nuts (4).
NOTE
Follow-on maintenance required;
Install mixer trough; refer to para 9-9B.
9-32
Back to Top


