TM-9-1290-262-24-P - Page 47 of 192
9
10
11
12
13
14
15
16
17
18
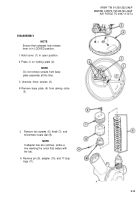
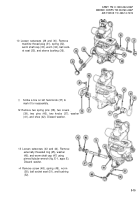
Using a spanner wrench, turn three clamps
(7) alternately until movement of knob
assembly (6) feels firm.
Attach torque wrench with torque wrench
adapter (fig. E-2, appx E) to locking knob
(6) and adjust tightness of each clamp (7)
until a torque of 32.0 to 68.0 in.-oz (3.6 to
7.6 N-m) is reached at the locking knob.
Apply sealing compound (item 8, appx D)
to three setscrews (10). Tighten three
setscrews securely.
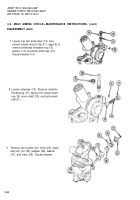
If removed, install two new pins (11 and
12).
Aline pin on bottom of circular level (13)
with hole in body assembly receptacle.
Insert circular level (13) into body
assembly (4).
Insert shim (14), flat side down, and install
ring (15). Tighten securely, using pinned
tubular wrench (fig. E-1, appx E). Set-
screws (16) will be tightened during
collimation.
Install level vial (17).
Install eccentric (18) and eccentric ring
(19). Do not tighten eccentric ring.
Install level vial cover (20).
ARMY TM 9-1290-262-24&P
MARINE CORPS TM 00476C-24&P
AIR FORCE TO 49A7-3-72/74
3-19
Back to Top

