TM-9-2320-260-20 - Page 1031 of 1337
TM 9-2320-260-20
I
13-25. DUMP HOIST SAFETY LATCH MAINTENANCE
THIS TASK COVERS:
a.
Removal
d. Assembly
b. Disassembly
e. Installation
c. Cleaning and Inspection
INITIAL SETUP
APPLICABLE MODELS
M817
MATERIALS/PARTS
Three cotter pins
Five locknuts
Two packings
Cap and plug set (Appendix C, Item 9)
Rags (Appendix C, Item 22)
Drycleaning solvent (Appendix C, Item 29)
Antiseize tape (Appendix C, Item 30)
REFERENCES (TM)
LO 9-2320-260-12
TM 9-2320-260-10
TM 9-2320-260-20P
EQUIPMENT CONDITION
•
Parking brake set (TM 9-2320-260-10).
●
Dump body raised and safety braces in place
(TM 9-2320-260-10).
●
Hydraulic reservoir drained (LO 9-2320-260-12).
GENERAL SAFETY INSTRUCTIONS
●
Ensure safety braces are positioned before
working under raised dump body.
●
Eye protection is required when using a wire
brush.
●
Keep fire extinguisher nearby when using
drycleaning solvent.
WARNIN G
Never work under raised dump body until safety braces are
properly positioned. Injury to personnel may result if dump body
suddenly lowers.
CAUTION
Cap or plug all openings immediately after disconnecting lines and
hoses to prevent contamination. Remove caps or plugs prior to
installation. Failure to do so may result in damage to equipment.
NOT E
●
Tag hoses for installation.
●
Have drainage container ready to catch hydraulic oil,
1.
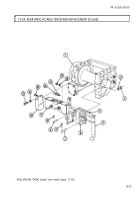
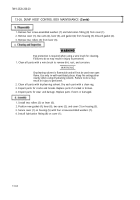
Disconnect two hydraulic hoses (1) from safety latch cylinder (10).
2.
Remove two packings (2) from safety latch cylinder (10). Discard packings (2).
3. Remove four locknuts (7), washers (8), screws (3), locknut (6), screw (4), and safety latch
assembly (9) from subframe (5). Discard locknuts (7) and (6).
1.
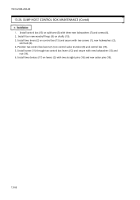
Remove cotter pin (23) and washer (22) from pin (13). Discard cotter pin (23).
2. Slowly release spring (12) and remove pin (13) and spring (12) from mounting bracket (14) and
safety hook (11).
3. Remove cotter pin ( 19), pin (16), and two washers (20) from safety latch cylinder (10) and safety
hook (11). Discard cotter pin (19).
4. Remove safety hook (11) from safety latch cylinder (10) and mounting bracket (14).
5. Remove two lubrication fittings (21) from safety hook (11).
6. Remove cotter pin (18), pin (17), four washers (15), and safety latch cylinder (10) from mounting
bracket (14). Discard cotter pin (18).
13-58
Back to Top


