TM-9-2320-279-20-1 - Page 574 of 985
TM 9-2320-279-20-1
Electrical System Maintenance Instructions (Cont)
7-3. ALTERNATOR AND PULLEY REMOVAL/lNSTALLATlON (CONT).
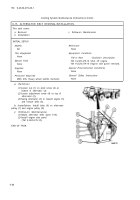
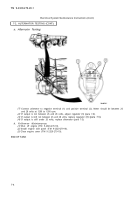
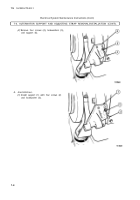
(5)
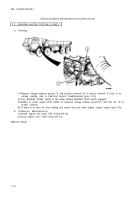
Clamp pulley (13) in vise with soft jaws.
(6)
Loosen locknut (14) until shaft (15)
turns.
(7)
Using lockjaw pliers, hold inside
flange (16) of pulley (13) and remove
locknut (14).
NOTE
There are two types of alternator pulleys. Model
A has no key, while Model
B
includes one.
(8)
Remove pulley (13) from vise and
remove pulley and key (16.1) from
shaft (15).
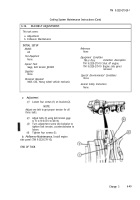
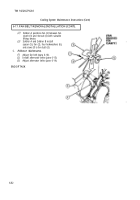
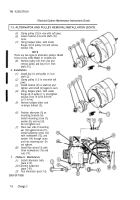
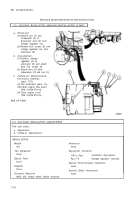
6. Installation.
(1)
(2)
(3)
(4)
(5)
(6)
(7)
(8)
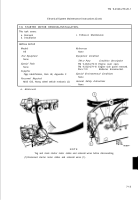
Install key (1) and pulley (1.1) on
shaft (2).
Clamp pulley (1.1) in vise with soft
jaws.
Install locknut (3) on shaft (2) and
tighten until shaft (2) begins to turn.
Using lockjaw pliers, hold inside
flange (4) of pulley (1.1) and tighten
locknut (3) to 70 to 85 lb-ft (95
to 115 N •m).
Remove lockjaw pliers and
re-torque locknut (3).
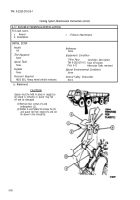
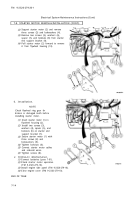
Position alternator (5) on
mounting brackets (6).
Install mounting screw (7),
washer (8), and nut (9).
Do not tighten nut.
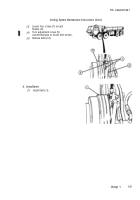
Place rear side of mounting
ear (10) against brace (11).
Install adjusting screw (12)
with lockwasher (13), and
washer (14) through brace
and into mounting ear. Do
not tighten.
Install five wires (15) with
three lockwashers (16) and
nuts (17).
C.
Follow-on Maintenance.
(1)
Install alternator belts
(para 6-15).
(2)
Connect batteries
(para 7-91).
(3)
Test alternator (para 7-2).
END OF TASK
7-6
Change 3
Back to Top

