TM-9-2320-280-20-2 - Page 332 of 951
4-57. REAR COMPOSITE LIGHT LAMP REPLACEMENT
This task covers:
a. Removal
b. Installation
a. Removal
1.
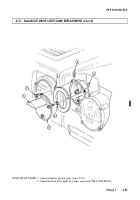
Loosen six retaining screws (3) and remove composite light door (4) and O-ring (5) from composite
light (1). Discard O-ring (5).
2.
Remove lamp (2).
3.
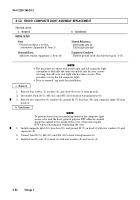
Clean mating surface on light door (4) and composite light (1). Remove sealant.
INITIAL SETUP:
Tools
General mechanic’s tool kit:
automotive (Appendix B, Item 1)
Materials/Parts
O-ring (Appendix G, Item 221)
Adhesive sealant (Appendix C, Item 10)
Manual References
TM 9-2320-280-10
TM 9-2320-280-24P
Equipment Condition
Battery ground cable disconnect (para. 4-73).
1.
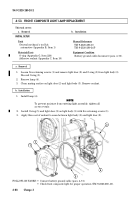
Install lamp (2).
2.
Install O-ring (5) and composite light door (4) on composite light (1) with six screws (3).
3.
Apply a thin coat of sealant to seam between composite light (1) and composite light door (4).
TM 9-2320-280-20-2
4-94
Change 3
FOLLOW-ON TASKS: • Connect battery ground cable (para. 4-73).
• Check front composite light for proper operation (TM 9-2320-280-10).
NOTE
To prevent moisture from entering light assembly, tighten all
screws evenly.
b. Installation
1
2
3
4
5
Back to Top


