TM-9-2320-280-20-3 - Page 225 of 1168
TM 9-2320-280-20-3
10-186.2
Change 2
10-108.1. 10,500 LB HYDRAULIC WINCH AND BRACKETS REPLACEMENT
Applicable Models:
All vehicles except M996, M996A1, M997,
M997A1, M997A2, M1035, M1035A1,
M1035A2.
Tools
General mechanics tool kit: automotive
(Appendix B, Item 1)
Maintenance and repair shop equipment:
automotive (Appendix B, Item 2)
Materials/Parts
Locknut (Appendix G, Item 70)
Six locknuts (Appendix G, Item 80)
Four locknuts (Appendix G, Item 81)
Two locknuts (Appendix G, Item 89)
Manual References
TM 9-2320-280-10
TM 9-2320-280-24P
Equipment Condition
• Parking brake applied (TM 9-2320-280-10)
• Battery ground cables disconnected
(para. 4-73).
• Underbody protection kit removed
(if applicable) (para. 12-186).
• Brake protection guards removed
(if applicable) (para. 7-8.1).
General Safety Instructions
Support winch and bumper during winch
replacement.
NOTE
Tag all leads prior to removal.
1.
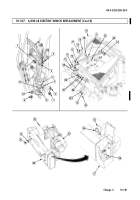
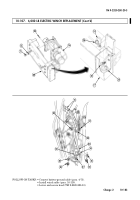
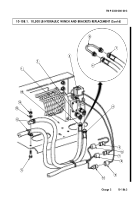
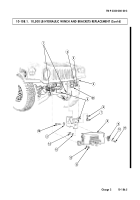
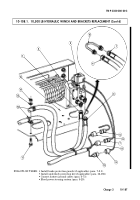
Disconnect controller plug lead 758C (10) from winch lead 758C (9).
2.
Disconnect controller plug lead 758A (8) from winch lead 758A (7).
3.
Disconnect controller plug lead 758B (6) from lead wire 758B (5).
4.
Remove locknut (14), washer (13), screw (11), and two clamps (12) with hydraulic hose assemblies
(1) and (4) from winch and bumper assembly (15). Discard locknut (14).
CAUTION
• Tag hoses and connections prior to removal to assist in proper
installation.
• Cover or plug hoses and connections immediately after removal to
prevent contamination. Remove all plugs prior to connecting
hoses.
5.
Disconnect hydraulic hose (1) from elbow (2) on bottom winch outlet port on winch (15) .
6.
Disconnect hydraulic hose (4) from elbow (3) on top winch inlet port on winch (15).
NOTE
If vehicle is to be operated with winch assembly removed,
perform step 7.
7.
Connect tube assembly (16) to hydraulic hose assemblies (1) and (4).
a. Winch Removal
This task covers:
a. Winch Removal
c. Brackets Installation
b. Brackets Removal
d. Winch Installation
INITIAL SETUP:
Back to Top

