TM-9-2320-361-34 - Page 515 of 764
TM 9-2320-361-34
15-46. OUTRIGGER CONTROL VALVE REPLACEMENT
THIS TASK COVERS:
a. Removal
b. Installation
INITIAL SETUP
APPLICABLE MODELS
M764
TOOLS
General mechanic’s tool kit
(Appendix B, Item 1)
MATERIALS/PARTS
Four cotter pins (Appendix F, Item 22)
REFERENCES (TM)
LO 9-2320-209-12-1
TM 9-2320-361-10
TM 9-2320-361-34P
EQUIPMENT CONDITION
●
Parking brake set (TM 9-2320-361-10).
. Hydraulic tank drained (LO 9-2320-209-12-1).
Three lockwashers
-
(Appendix F, Item 125)
Cap and plug set (Appendix
C,
Item 5)
Antiseize tape (Appendix C, Item 25)
CAUTION
When disconnecting hydraulic lines, plug all openings to prevent
dirt from entering and causing internal parts damage. Prior to
installation, remove plugs from openings. Failure to do so may
result in damage to equipment.
a. Removal
NOTE
. Tag hoses for installation.
●
Have
drainage
container
ready
to
catch
oil.
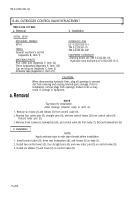
1. Remove six hoses (2) and elbows (7) from control valve (9).
2.
Remove four cotter pins (5), straight pins (4), and two control levers (3) from control valve (9).
Discard cotter pins (5).
3.
Remove three screws
(6),
lockwashers (8), and control valve (9) from body (1). Discard lockwashers (8).
I
b. Installation
I
NOTE
Apply antiseize tape to male pipe threads before installation.
1. Install control valve (9), three new lockwashers (8), and screws (6) on body (1).
2. Install two control levers (3), four straight pins (4), and new cotter pins (5) on control valve (9).
3. Install six elbows (7) and hoses (2) on control valve (9).
15-204
Back to Top


