TM-9-2330-356-14
SEMITRAILER, TANK: 5000 GALLON, BULK HAUL, SELF LOAD/UNLOAD M967 AND M967A1; SEMITRAILER, TANK: 5000 GALLON, FUEL DISPENSING, AUTOMOTIVE M969 AND M969A1; SEMITRAILER, TANK: 5000 GALLON, FUEL DISPENSING, UNDER/OVERWING AIRCRAFT M970 AND M970A1
TECHNICAL MANUAL; OPERATOR’S, UNIT, DIRECT SUPPORT, AND GENERAL SUPPORT MAINTENANCE MANUAL
OCTOBER 1990
TM-9-2330-356-14 - Page 176 of 528
TM 9-2330-356-14
(f)
Starting at the right marker light box,
thread a lacing wire through the conduit. Attach the lead
assembly to the lacing wire, and pull the lead into right
marker box.
(g)
Install new terminal onto the lead
assembly.
(h)
Place the three ends of the lead
assembly in the left marker box into the access hole.
(i)
Connect the right marker light lead to
the lead assembly. Replace the gasket and cover
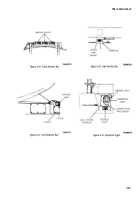
(fig. 4-21). Secure with eight screws.
(j)
Through the front access hole, connect
the left marker light lead assembly (No. 489) to the right
marker light lead assembly. Connect the other two leads
(No. 21-489) to the receptacle lead (No. 21-489) and the
wire harness lead (No. 21-489).
(k)
Replace the gasket and the front access
cover by securing with six screws (fig. 4-17).
(l)
Connect the left marker light lead
(No. 489) to the lead assembly. Replace the receptacle box
cover and gasket by securing with eight screws.
(m)
Test operation of lights.
(5)
Wiring Harness Replacement.
NOTE
The terminals must be removed to pull
harness through the conduit.
(a)
One at a time, remove each marker light
box cover and gasket on the semitrailer’s left side, then
composite light box cover and gaskets. Disconnect all
wiring harness leads and cut the terminals from the wiring
harness leads.
(b)
Pull the portion of wiring harness that
runs across rear of the semitrailer out through the left rear
composite light box.
(c)
Remove
the front access
cover
(fig. 4-17) and disconnect all wire harness leads from the
receptacle and marker light leads.
(d)
Pull the wiring harness out through the
front access hole.
NOTE
As harness Is being pulled Into conduit, coat
harness with a silicon lubricant or mild soap
solution. Do not coat entire harness at one
time.
(e)
Starting at left rear composite light box,
thread a lacing wire through conduit and out the front
access hole. Attach lacing wire to new harness, then pull
harness through conduit and out the composite light box.
(f)
Disconnect lacing wire and thread it
through right composite light box, conduit, and out left
composite light box. Attach lacing wire to wire harness and
pull wiring harness out right composite light box.
(g)
In each light box, pull wiring harness
leads out of conduit and into light box. Install new
terminals onto each wiring harness lead.
(h)
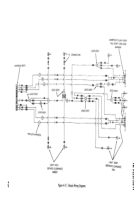
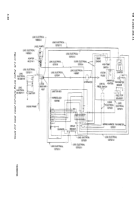
Connect all light leads to wiring harness
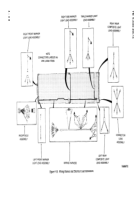
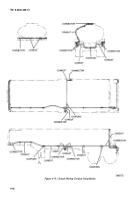
leads (fig. 4-15).
(i)
Replace all light box covers and gaskets.
(j)
In the front access hole, connect harness
leads to receptacle and marker light leads.
(k)
Replace front access hole cover and
gasket. Secure with six screws.
(l)
Test operation of semitrailer lights.
(6) Receptacle Assembly Replacement.
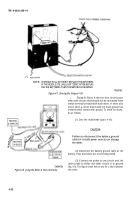
(a)
Remove six screws from front access
cover (fig. 4-17). Remove cover and gasket.
(b)
Inside access hole, disconnect all
electrical leads from the receptacle electrical leads.
Remove screw that fastens the receptacle ground leads to
the semitrailer.
(c)
Remove four screws and lockwashers
from the receptacle mounting plate, and remove the
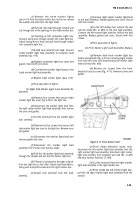
receptacle and-gasket (fig. 4-18).
(d)
To install receptacle, reverse steps
through (c).
(e)
Test operation of semitrailer lights.
(a)
4-40
Back to Top

