TM-9-2330-356-14
SEMITRAILER, TANK: 5000 GALLON, BULK HAUL, SELF LOAD/UNLOAD M967 AND M967A1; SEMITRAILER, TANK: 5000 GALLON, FUEL DISPENSING, AUTOMOTIVE M969 AND M969A1; SEMITRAILER, TANK: 5000 GALLON, FUEL DISPENSING, UNDER/OVERWING AIRCRAFT M970 AND M970A1
TECHNICAL MANUAL; OPERATOR’S, UNIT, DIRECT SUPPORT, AND GENERAL SUPPORT MAINTENANCE MANUAL
OCTOBER 1990
TM-9-2330-356-14 - Page 177 of 528
TM 9-2330-356-14
4-14. Marker Lights
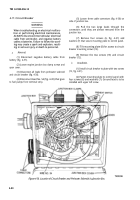
TA502343
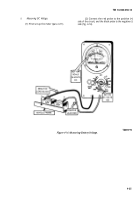
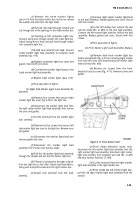
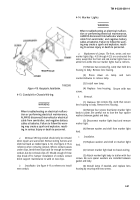
Figure 4-18. Receptacle Installation.
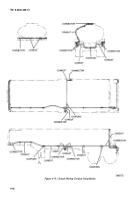
4-13. Conduit for Chassis Wiring
WARNING
When troubleshooting an electrical malfunc-
tion or performing electrical maintenance,
ALWAYS disconnect Intervehicular electrical
cable from semitrailer, and negative battery
cables at batteries. Failure to follow this warn-
ing may create a spark and explosion, result-
ing in serious Injury or death to personnel.
a.
Removal.
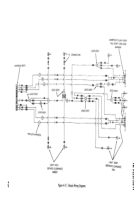
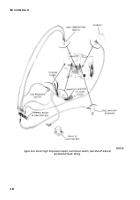
Wiring conduit should only be removed
when repairs are warranted. Remove wiring harness and
electrical leads as needed (para 4-12). Use figure 4-19 as
reference when removing conduit. Where conduit passes
under clips, bend these clips back far enough to remove
conduit, but do not break clips off. Should enough of these
clips break off to hamper installation of conduit, contact
direct support maintenance to weld on new clips.
b.
Installation.
Use figure 4-19 as reference to install
new conduit.
WARNING
When troubleshooting an electrical malfunc-
tion or performing electrical maintenance,
ALWAYS disconnect Intervehicular electrical
cable from semitrailer, and negative battery
cables at batteries. Failure to follow this warn-
ing may create a spark and explosion, result-
ing In serious injury or death to personnel.
a.
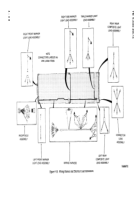
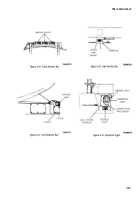
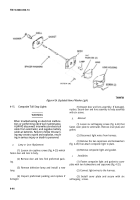
Replacement of Lamps. The
front, center, and rear
marker lights (figs. 4-20 through 4-23) are constructed the
same, except that the front and side marker lights have an
amber lens while the rear marker lights have a red lens.
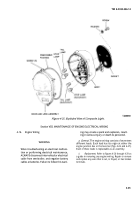
(1) Remove two screws (fig. 4-24) that hold lens
housing to body. Remove lens housing.
(2) Press down on lamp and turn
counterclockwise to remove lamp.
(3) Install new lamp.
(4) Replace
screws.
b.
Removal.
(1) Remove
lens housing.
Secure with two
two screws (fig. 4-24) that secure
lens housing to body. Remove lens housing.
(2) Remove four screws that fasten marker light
body to plate. Be careful not to lose the four spacer
washers between gasket and body.
(3) Disconnect marker light lead and remove
marker light.
(4) Remove washer and shell from marker light
lead.
c.
Installation.
(1) Replace washer and shell on marker light
lead.
(2) Connect marker light lead to chassis wiring.
(3) Attach marker light body to trailer with four
screws. Be sure spacer washers are installed between
gasket and body.
(4) Install lamp if needed, and replace lens
housing by securing with two screws.
4-41
Back to Top

