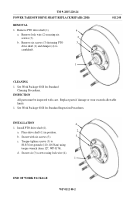
TM-9-2815-220-24 - Page 895 of 1563
TM 9-2815-220-24
PTO COUPLING/FUEL PUMP DRIVE HOUSING REPAIR (2DR ONLY)
0111 00
CLEANING
1. See Work Package 0028 for Standard Cleaning Procedures.
INSPECTION
All parts must be inspected with care.
Replace parts if damage or wear exceeds allowable
limits.
1. See Work Package 0028 for Standard Inspection Procedures.
2. Take critical measurements.
Replace any part that does not meet the limits specified in the
following table.
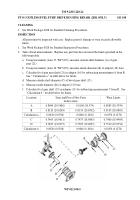
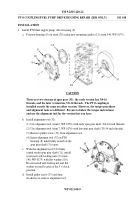
a. Using micrometer (item 17, WP 0176), measure outside shaft diameter (A) of spur
gear (21).
b. Using micrometer (item 16, WP 0176), measure inside diameter (B) of adapter (16) bore.
c. Calculate fit of spur gear shaft (21) in adapter (16) by subtracting measurement A from B.
See " Calculation a." in table below for limits.
d. Measure outside shaft diameter (C) of bevel gear shaft (15).
e. Measure inside diameter (D) of adapter (13) bore.
f.
Calculate fit of gear shaft (15) in adapter (13) by subtracting measurement C from D.
See
"Calculation b." in table below for limits.
Location
Sizes and Fits of New Parts
inches (mm)
Wear Limits
A
0.8090 (20.5486)
0.8100 (20.574)
0.8085 (20.5359)
B
0.8120 (20.6248)
0.8130 (20.6502)
0.8145 (20.6883)
Calculation a.
0.0020 (0.0508)
0.0040 (0.1016)
0.0050 (0.1270)
C
0.7465 (18.9611)
0.7475 (18.9865)
0.7460 (18.9484)
D
0.7495 (19.0373)
0.7505 (19.0627)
0.7510 (19.0754)
Calculation b.
0.0020 (0.0508)
0.0040 (0.1016)
0.0050 (0.1270)
D
13
C
15
B
16
A
21
WP 0111 00-5
Back to Top

