TM-9-2910-226-34 - Page 144 of 208
TM 9-2910-226-34
manually work the valve in the bore. Valve must be
free with no sticking or binding. If valve does not
operate freely, replace the hydraulic head assembly.
g. Install valve (C), delivery valve spring (B), and
screw (A), and torque tighten valve screw to 40-45
foot-pounds. Loosen screw and retorque to 40-45
foot-pounds two more times.
3-54. Delivery Valve Test.
a.
Rotate the drive
coupling in a counterclockwise direction until the
slotted, red painted tooth is one-half tooth to the
right of the mark on the pump housing.
b.
Slowly actuate the nozzle tester and note the
reading on the nozzle tester gages as the delivery
valve opens. This will be evidenced by a sudden drop
in pressure. The delivery valve should open between
250 and 400 psig.
NOTE
Do not exceed 425 psig as damage to
preformed packings may result.
c.
If the reading is not within specification,
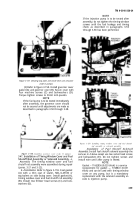
remove the delivery valve and inspect the spring,
valve, and seat for foreign matter or damaged parts
(fig. 3-166). If spring is defective, replace spring. If
valve or seat is defective, replace the hydraulic head
assembly.
3-55. Hydraulic Head Leak Test.
a.
Remove timing
device cover, timing window cover or fuel shutoff
housing. Rotate the drive coupling in a clockwise
direction until the mark on the advance unit hub is
alined with the pointer (port closing) (fig. 3-168).
Table 3-4. Calibration of LDT-465-1C (Code E Pump)
3-98
Back to Top


