TM-9-6015 - Page 27 of 54
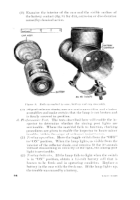
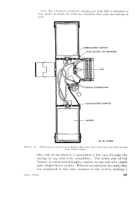
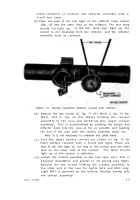
Figure 12.
(a)
(b )
(c)
Expose the wiring as described in (2) (c) above.
Examine all visible soldered joints between cables and con-
tacts, cables and switch, and cables and reflector. Soldered
connections must be good and firm. Inspect the cable leads
carefully for breaks and cracked insulation.
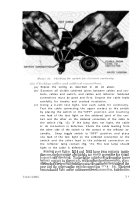
Using a 6-volt test light, test each cable for continuity.
Test the cable connecting the upper contact to the switch
by placing the switch in the “OFF” position and touching
one lead of the test light on the soldered joint of the con-
tact and the other on the soldered connection of the cable to
the switch (fig. 12). If the lamp does not light, the cable
or its connection is defective. Check the cable leading from
the other side of the switch to the contact or the reflector as-
sembly.
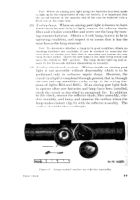
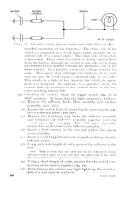
Snap toggle switch to “OFF” position and place
one lead of the test light on the soldered connection on the
switch and the other lead to the soldered connection on
the reflector lamp contact (fig. 13). The test lamp should
light or the cable is defective.
.Aiming lmst lights M14 md J143 Ilave two eontucts inside
the cwse, the 10IVW one of which is not wsily :lcwssible for visual
illslwcti(nl or cllwlii]lg.
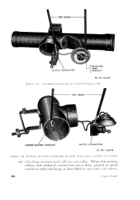
To chwk the c;dIle lending from the 10WVI’
lmtrery c(jnt:[ct to tile switch. without further disws~ml)ly, place
one lea(l of the test light on the contact fronl the battery side of the
C;lse :Ind tli(. (~ther (Ju th(, swit(.h ((]uile(.ti(}u
(fig. 14). ‘l%e test
la IIIII SII( Iui(l light (Jr the cable or soldere(l conl]wtion, is defective,.
2 1
Back to Top

