MWO-5-2350-262-35-1 - Page 18 of 24
MWO 5-2350-262-35-1
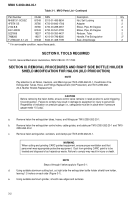
Table 3-1.
MWO Parts List - Continued
Part Number
CAGE
NSN
Description
Qty
M45913/1-5CG5Z
81349
Nut, Self Locking
8
4FBTX-SS
30780
Adapter
2
2102-8-8
30780
Elbow, Pipe, 90 Degree
2
8-8 140339
81343
Elbow, Pipe, 45 Degree
3
5227606
19207
Reducer, Tube
2
7968260
19207
Handle, Fire Extinguisher
2*
F-2738-A01-3-1-24
81348
Seal, Antipilferage
2
*
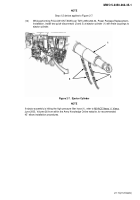
If in serviceable condition, reuse these parts.
SECTION II. TOOLS REQUIRED
Tool Kit, General Mechanics: Automotive, NSN 5180-00-177-7033
SECTION III. REMOVAL PROCEDURES AND RIGHT SIDE BOTTLE HOLDER
SHIELD MODIFICATION FOR HALON (OLD PRODUCTION)
NOTE
Pay attention to all Notes, Cautions, and Warnings per TM 5-2350-262-20-1, Fixed Halon Fire
Extinguisher Tubes, Hose, and Fittings Replacement (Old Production) and TM 5-2350-262-
20-2, Muffler Shields Replacement.
CAUTION
Before removing the halon bottle, ensure control valve remains in reset position to avoid triggering
fire extinguisher.
Failure to comply may result in damage to equipment or injury to personnel.
Regardless of indication on pressure gauge i.e., safeguards must be in place even if pressure
gauge reads “0.0 psig”.
a.
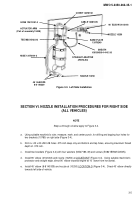
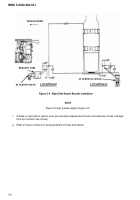
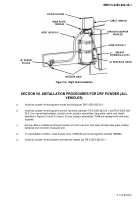
Remove halon fire extinguisher tubes, hoses, and fittings per TM 5-2350-262-20-1.
b.
Remove halon fire extinguisher control valve, cable guides, and cable per TM 5-2350-262-20-1 and TM 5-
2350-262-20-2.
c.
Remove halon extinguisher, canisters, and clamps per TM 5-2350-262-20-1.
WARNING
When cutting and grinding CARC painted equipment, ensure proper ventilation and that
personnel wear appropriate protective equipment.
Dust from grinding CARC paint is to be
treated and disposed of as hazardous waste. Failure to comply may result in injury or death.
NOTE
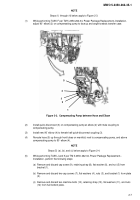
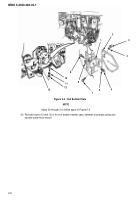
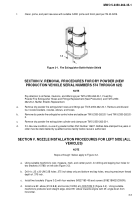
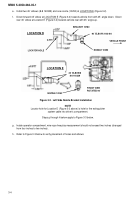
Steps d through f below apply to Figure 3-1.
d.
Using suitable aluminum cutting tool, cut right side fire extinguisher bottle holder shield from holder,
leaving 1.5 inches on each side (Figure 3-1).
e.
Using suitable aluminum grinder, smooth new edges and surfaces.
3-2
Back to Top

