TB-9-2300-378-14 - Page 188 of 296
TB 9-2300-378-14
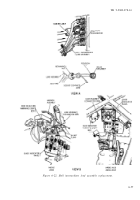
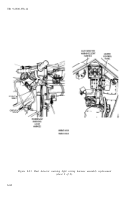
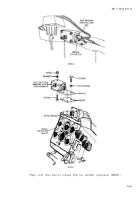
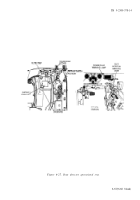
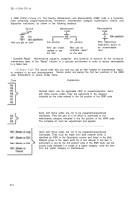
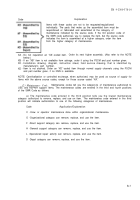
j. Dust Detector Operational Test (Fig. 6-27).
(1)
(2)
(3)
(4)
(5)
(6)
(7)
(8)
(9)
(10)
(11)
6-66
NOTE
Operational test may be performed with powerplant out of
vehicle if ground hop kit has starter cable modified to
accommodate improved clean air system. If powerplant is out
of vehicle, rig for powerplant test run with engine air
cleaner (ground hop kit) (TM 20-1).
NOTE
Operational test is the same for both right and left sides.
Open top deck grille doors.
Remove dust and dirt from filter strip cover and compressor housing.
Loosen three captive screws securing filter strip cover to compressor housing, but
do not remove cover.
Insert 1 inch wide strip of non-porous material (plastic, celluloid, etc.) over filter
strip.
Tighten three captive screws.
Make sure area around vehicle is clear of personnel and
equipment before performing step (6).
Start engine.
Apply vehicle brakes.
Put transmission lever in high gear. Operate
engine at 1800-1900 rpm for no more than 30 seconds. Observe powerplant and
dust detector warning lamp.
(a)
If powerplant and dust detector warning lamps light, system is operational; go
to step (7).
(b)
If powerplant and dust detector warning lamps do not light, check to see if
dust detector switch tripped.
A red plunger visible through plastic cover on
switch indicates switch has tripped.
If switch tripped, go to Troubleshooting
Malfunction 10. If detector switch did not trip, repeat step 6 to verify. If
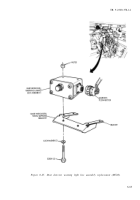
switch still does not trip, replace dust detector switch (para. 6-17b).
Stop engine.
Loosen three captive screws securing filter strip cover to housing and remove
non-porous material from filter strip and cover.
Tighten three captive screws.
Press plunger to reset pressure switch.
Close top deck grille doors.
Back to Top

