TB-9-2920-225-34-1 - Page 58 of 70
TB 9-2920-225-34-1
CHAPTER 4
LELAND AIRBORNE MODEL
4-1. Introduction.
One model was produced by
Leland Airborn Products Division of American
Machine and Foundry Co. The manufacturer’s
name is now:
CODE IDENT
07639 (FSCM)
Leland Electrosystems Inc.
740 E. National Road
P.O. B
OX
128
Vandalia, OH 45377
TELEPHONE
AC 513898-5881
The manufacturer is also now known as AMF
Electrosystems Division at the same address. The
manufacturer’s part number for this model is CSV
2183-1.
4-2. General Inspection.
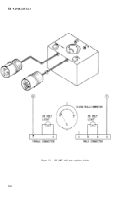
a. Regulator Box Assembly (external).
Check
for missing or stripped cover, connector and
mount retainer screws and voltage adjustment ac-
cess plug. Check connectors for signs of arcing,
bent or pushed in pins, broken connectors and
thread damage. Correct deficiencies by utilization
of serviceable components from unrepairables or
requisitioning components from the manufacturer.
The pin receptacle (J2) is part number 19207–
7064429 or MS3102A28–22P per MIL-C-5015.
The socket receptacle (Jl) is part number 19207-
7064706, for which there is no equivalent NSN
number.
As assembly is available from Bendix.
CODE IDENT
77820 (FSCM)
Bendix Corp. The
Components Div.
Sherman Avenue
Sidney, NY 13838
Electrical
It should be ordered as part number 60–42228–
10S, it is possible that extensive damage has been
done and the regulator cannot be easily repaired.
Components should be performance tested and re-
tained if acceptable. Check for disconnected or
burnt wires, missing components and replace/re-
pair as necessary. Carefully remove the transistor
mounting plate noting the position of the screws,
washers and rubber insulators. Visually inspect
the circuit board for burnt components. Replace
the circuit board through cannibalization if burnt
components are found. Carefully reinstall the
transistor mounting plate.
c. Regulator Verification Check.
After perform-
ing the regulator appears to be in good condition,
check its performance on a test stand.
If the regulator fails this check, proceed to para-
graph 4–3.
4-3. Bench Testing.
a. General.
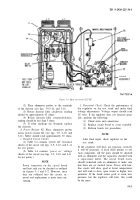
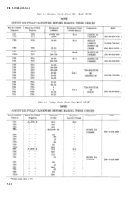
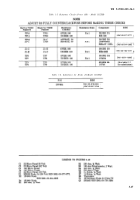
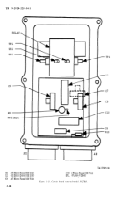
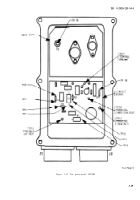
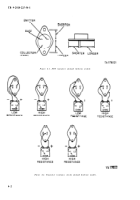
Figures 4-1 and 4-2 show the
method for testing NPN transistors. Figure 4-3
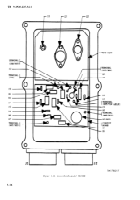
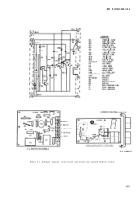
shows a plan view of the circuit board assembly,
the regulator with the cover and circuit board re-
moved, and an electrical schematic diagram of the
regulator.
b. Diode and Relay.
(1) Remove six screws and place the circuit
board to one side.
(2) Place positive probe of ohmmeter to pin
F of connector J2, (see fig. 4-3).
(3) Place negative probe to TP1. Meter
should indicate low resistance.
(4) Reverse probes. Meter should indicate
high resistance.
(5) If other readings are obtained, replace
diode CR6, (see fig. 4-3).
(6) Move negative probe to TP2. Meter
should read approximately 250 ohms.
(7) If another reading is obtained, replace
the relay, (see fig. 4–3).
c. Field Discharge Diode.
(1) Place positive probe of ohmmeter to pin
E of connector J1 (see fig. 4-3).
(2) Place negative probe to pin B of J1.
Meter should indicate low resistance.
(3) Reverse the probes. Meter should indi-
cate high resistance.
(4) If other readings are obtained, replace
diode CR7.
4-1
Back to Top

