TM-9-2320-272-24-3 - Page 590 of 799
4-178. FRONT
TM 9-2320-272-24-3
THIS TASK COVERS:
a. Removal
b. Installation
INITIAL SETUP:
APPLICABLE MODELS
M925/A1/A2, M928/A1/A2, M932/A1/A2,
M936/A1/A2
TOOLS
General mechanic’s tool kit (Appendix E, Item 1)
MATERIALS/PARTS
Cotter pin (Appendix D, Item 62)
O-ring (Appendix D, Item 458)
Two O-rings (Appendix D, Item 457)
Two O-rings (Appendix D, Item 430)
Four locknuts (Appendix D, Item 315)
Three locknuts (Appendix D, Item 291)
Cap and plug set (Appendix C, Item 14)
REFERENCES (TM)
LO 9-2320-272- 12
TM 9-2320-272-10
TM 9-2320-272-24P
EQUIPMENT CONDITION
Parking brake set (TM 9-2320-272-10).
Hydraulic oil reservoir drained (para. 4-188).
GENERAL SAFETY INSTRUCTIONS
Do not cross hoses when installing.
Plug hydraulic hoses to prevent dirt from entering.
NOTE
All hoses and fittings must be tagged for installation.
1.
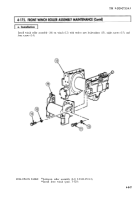
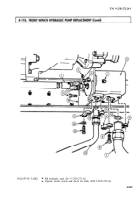
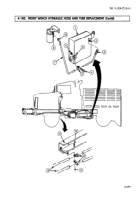
Disconnect hoses (1), (4), (5), and (6) from control valve (7). Tag for installation.
2.
Remove cotter pin (14), washer (15), and clevis pin (3) from cable clevis (2). Discard cotter pin (14).
3.
Remove three locknuts (13), screws (10), and control valve (7) from bracket (12). Discard locknuts (13).
4.
Remove four locknuts (8), screws (11), and bracket (12) from frame (9). Discard locknuts (8).
5.
Remove elbow (20) and adapter (25) from fitting (19) and elbow (26).
6.
Remove fittings (16) and (19) and elbows (18) and (26) from control valve (7).
7.
Remove four O-rings (17) from fittings (16) and (19) and elbows (18) and (26). Discard O-rings (17).
8.
Remove plug (21), spring (23), and relief valve (24).
9.
Remove O-ring (22) from plug (21). Discard O-ring (22).
1.
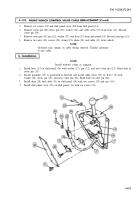
Install new O-ring (22) on plug (21) and install relief valve (24), spring (23), and plug (21) in control
valve (7).
2.
Install four new O-rings (17) and fittings (16), (18), (19), and (26) on control valve (7).
3.
Install fittings (20) and (25) on fittings (19) and (26).
4.
Install bracket (12) on frame (9) with four screws (11) and new locknuts (8).
5.
Install control valve (7) on bracket (12) with three screws (10) and new locknuts (13).
Do not cross hoses during installation. Crossing hoses may result
in injury to personnel.
4-854
Back to Top


